
TL;DR:
- Renters should conduct thorough, room-by-room inspections using checklists and timestamped photos before moving in.
- Documenting cleanliness and hazards protects tenants from disputes and health risks during their tenancy.
Authored by L.K. | Themaidsociety | Updated 2026
Table of contents
- What tools do you need before inspecting?
- How to inspect rental property cleanliness room by room
- How to tell dirt from a real health hazard
- What to do after the inspection
- Key Takeaways
- Perspective
- Professional cleaning help in Los Angeles
- FAQ
Inspecting rental property cleanliness is the process of systematically evaluating every surface, fixture, and hidden area of a rental unit to confirm it meets safe, livable standards before you move in or during your tenancy. Renters who skip this step risk inheriting health hazards, losing their security deposit over pre-existing damage, or living with mold and pests they never noticed. A proper inspection uses a rental property cleaning checklist, a smartphone, and a small flashlight to document conditions with timestamped evidence. This guide gives you a practical, room-by-room framework built for renters in Los Angeles, Beverly Hills, Santa Monica, and across Southern California.
What tools do you need before inspecting? {#tools}
The right preparation separates a useful inspection from a quick walkthrough you will regret later. Gather these tools before you arrive.
Core inspection tools
- Smartphone. Use it to shoot timestamped photos and videos of every room. Metadata embedded in the file proves when and where each image was taken.
- Small flashlight. Shine it inside cabinets, under sinks, behind appliances, and into ceiling corners. A phone torch works, but a dedicated pocket flashlight gives better coverage in tight spaces.
- Printed or digital checklist. Inspection checklists improve consistency and create defensive documentation during disputes. Use the same room sequence and rating language every time.
- Notepad or voice memo app. Record observations in real time so nothing gets forgotten.
- Coin or small ruler. Place it beside any stain or damage when photographing. Courts and property managers find photos with scale references far more credible than bare images.
Preparation steps
Schedule the walkthrough with your landlord or agent in advance. Routine inspections are recommended every 3–6 months to track property condition over time. That cadence matters because issues like slow leaks or mold growth are easy to miss if months pass between checks. Wear comfortable clothing you do not mind getting dusty, and plan for at least 45 minutes in a one-bedroom unit.
| Preparation step | Why it matters |
|---|---|
| Schedule with landlord | Avoids access disputes and creates a shared record |
| Bring a printed checklist | Keeps the inspection consistent and legally defensible |
| Use timestamped photos | Provides evidence if deposit disputes arise later |
| Bring a scale reference | Makes damage photos credible to property managers and courts |
| Allow 45+ minutes | Rushed inspections miss hidden issues like mold under sinks |
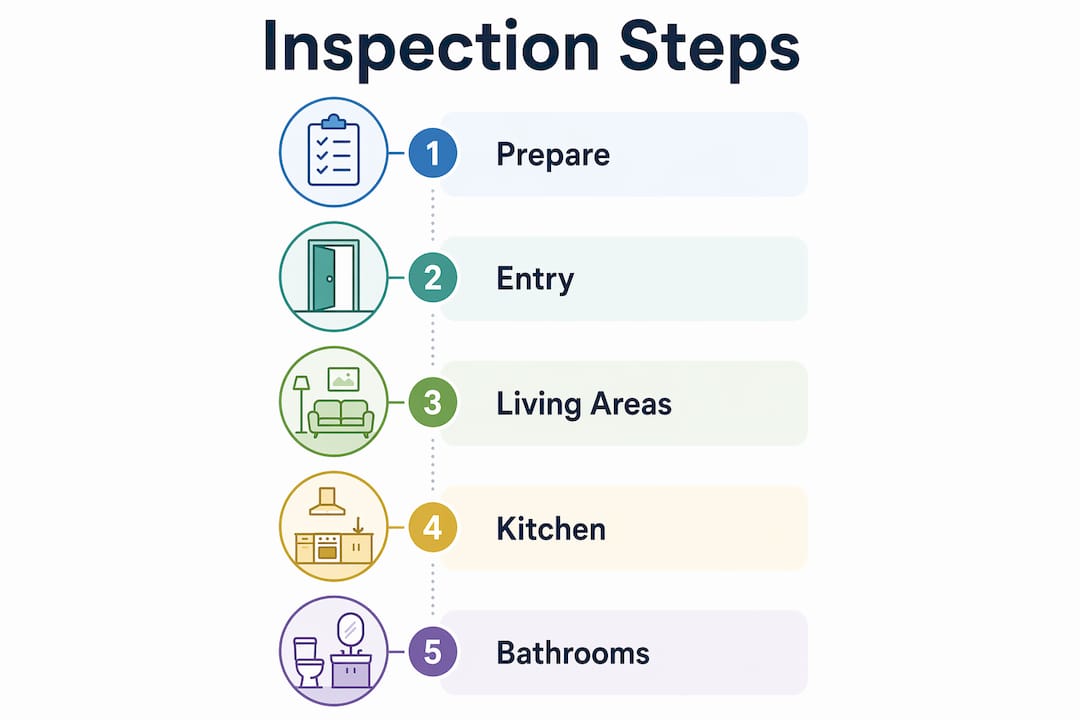
How to inspect rental property cleanliness room by room {#room-by-room}
A systematic, room-by-room approach is the most reliable way to evaluate rental cleanliness without missing anything. Start at the front door and work inward.
1. Entry and common areas
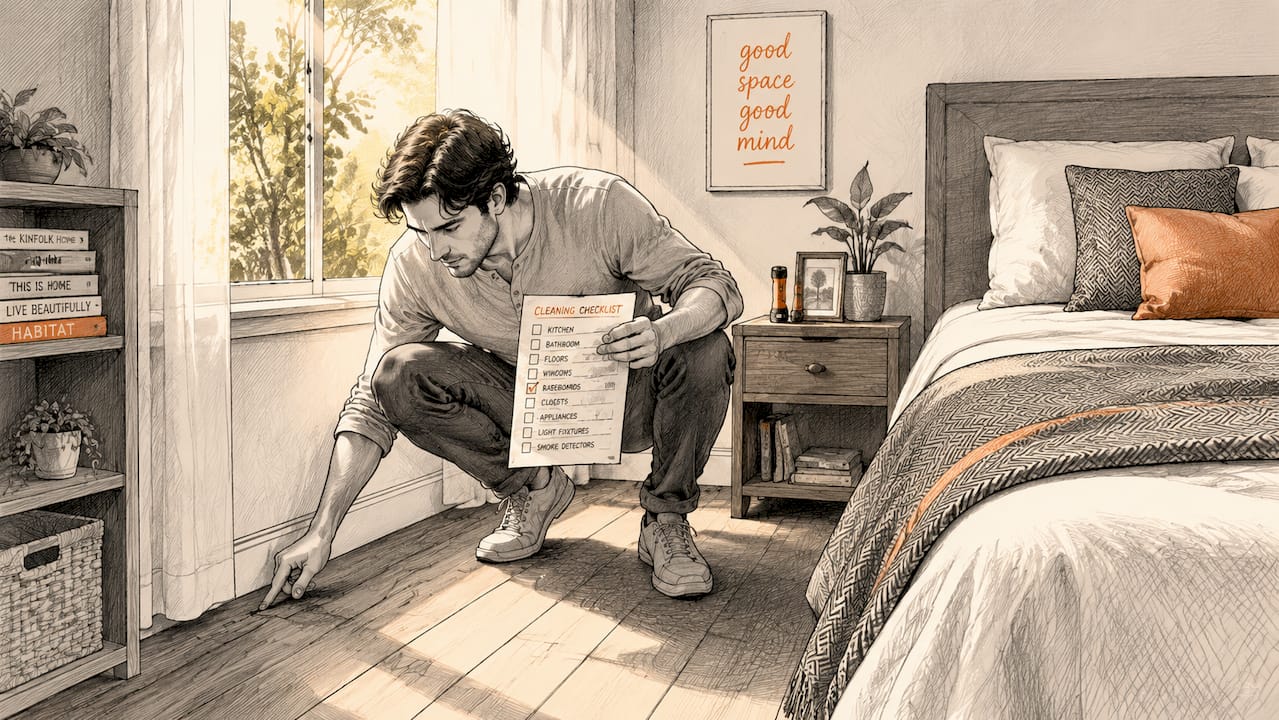
Check the front door frame, doormat area, and any shared hallways. Look for scuff marks, dirt buildup along baseboards, and signs of pest activity such as droppings near the threshold. Smell the air as you enter. A persistent musty odor is often the first sign of moisture damage, not just stale air.
2. Living room and bedrooms
Inspect floors first. Carpets should have no visible stains, odors, or matted sections. Hard floors should be free of sticky residue and grit. Run your hand along baseboards and window sills. Dust accumulation there is normal, but black or green discoloration on walls or ceilings signals mold. Shine your flashlight into closets and behind doors where cleaning is often skipped.
Pro Tip: Professional inspectors follow a dry-first, wet-last order: dust vents, fans, and walls before checking sinks, tubs, and floors. Use the same sequence during your walkthrough so you do not track debris into already-checked wet areas.
3. Kitchen
The kitchen is the highest-risk room for both cleanliness and health issues. Open every cabinet and drawer. Look for grease buildup, crumbs, and evidence of pests such as droppings or gnaw marks. Pull the oven away from the wall if possible and check behind it. Inspect the refrigerator coils and the drip pan underneath. Run the faucet and watch for slow drainage, which often indicates a partial blockage or a plumbing issue the previous tenant left behind.
Check the exhaust fan above the stove. A tissue held near the vent should flutter noticeably if the fan is working. A fan clogged with grease is both a fire hazard and a sign of poor upkeep.
4. Bathrooms
Bathrooms reveal the most about a property’s true cleanliness standards. Check grout lines between tiles. Pink or black discoloration in grout is mold, not just staining. Inspect caulking around the tub and shower base for cracks or gaps, which allow water to seep behind walls. Open the cabinet under the sink and look for water stains, soft wood, or rust on the pipes. These are signs of a slow leak that may have been present for months.
Test the exhaust fan the same way you tested the kitchen vent. Flush the toilet and confirm it refills without running continuously. A running toilet wastes water and signals a worn flapper valve.
5. Comparing cleanliness standards by room
| Room | Key cleanliness checks | Red flag signs |
|---|---|---|
| Kitchen | Grease, pests, drainage, exhaust fan | Droppings, standing water, clogged fan |
| Bathroom | Grout, caulking, under-sink cabinet | Black mold, soft wood, rust stains |
| Bedroom | Floors, baseboards, closet corners | Carpet odors, wall discoloration |
| Living room | Vents, windows, ceiling corners | Mold near AC vents, sticky floors |
| Entry | Door frame, threshold, shared halls | Pest evidence, persistent odors |
How to tell dirt from a real health hazard {#hazards}
Distinguishing cosmetic dirt from structural issues is the most critical skill in any cleanliness inspection. Oven grease requires cleaning. Black mold requires professional remediation. Treating them the same way puts your health at risk and complicates deposit negotiations.
These signs indicate something beyond surface cleaning:
- Black or green mold on walls or ceilings. This is not a cleaning issue. Mold indicates moisture intrusion from a leak, poor ventilation, or structural damage. It requires professional assessment.
- Water stains on ceilings or walls. Yellow or brown rings signal a past or active leak. Even if the area feels dry, the source may still be active above or behind the surface.
- Persistent odors that do not clear with ventilation. Musty smells that remain after opening windows for 10 minutes often come from hidden mold or water damage inside walls.
- Soft or spongy flooring near plumbing. Press gently near the base of the toilet or under the sink. Soft spots mean water has been seeping into the subfloor.
- Rust stains around fixtures. Surface rust on a faucet is cosmetic. Rust inside a cabinet or on a pipe joint signals a slow leak.
Tenants who thoroughly inspect for cleanliness often avoid costly health issues and deposit losses later. Documenting these hazards at move-in protects you from being charged for pre-existing damage when you leave. Source: First-Time Renter Checklist 2026
Expert inspectors classify issues as wear, tenant damage, deferred maintenance, or obsolete features. Knowing which category applies helps you communicate clearly with your landlord and understand who is responsible for repairs. A cracked tile from age is deferred maintenance. A broken window latch from misuse is tenant damage. The distinction matters for both health and money.
What to do after the inspection {#after}
Organizing your findings immediately after the walkthrough is as important as the inspection itself. Consistent documentation prevents disputes and improves communication with landlords and property managers.
- Sort photos by room. Create a folder for each space and label images clearly. Include at least one wide shot and one close-up per issue.
- Write a brief condition report. Note each issue with its location, a description, and whether it is a cleanliness concern or a potential repair need. Keep the language neutral and factual.
- Separate cleanliness issues from damage. A dirty oven is a cleaning issue. A cracked exhaust fan housing is damage. Mixing the two weakens your position in any future dispute.
- Send findings to your landlord in writing. Email is best because it creates a timestamped record. Attach your photos and condition report. Request written confirmation that the landlord has received them.
- Schedule a follow-up if needed. Standard rental turnovers take 5–7 days for basic cleaning and minor fixes. If the landlord commits to addressing issues, confirm a specific date and inspect again before moving in.
Pro Tip: Use your rental property cleaning checklist as the template for your condition report. Matching your notes to the checklist format makes follow-up inspections faster and keeps your documentation consistent across visits.
In Southern California rentals, particularly in high-demand markets like West Hollywood, Culver City, and Manhattan Beach, landlords often move quickly between tenants. Submitting your findings promptly gives you the best chance of having issues resolved before your move-in date. A move-in cleaning completed by a professional service creates a clean baseline that both you and your landlord can agree on.
Key Takeaways {#takeaways}
Renters who inspect with a checklist, document with timestamped photos, and distinguish dirt from damage protect both their health and their security deposit.
| Point | Details |
|---|---|
| Use the right tools | A smartphone, flashlight, and printed checklist are the minimum for a credible inspection. |
| Follow a room-by-room sequence | Starting at the entry and working inward prevents missed areas and cross-contamination. |
| Separate dirt from hazards | Mold, water stains, and soft flooring require landlord action, not just cleaning. |
| Document with scale references | Photos with a coin or ruler beside damage are far more credible in disputes. |
| Submit findings in writing | Email your condition report to the landlord immediately after the walkthrough. |
Why I think most renters inspect too fast {#perspective}
Most renters spend 10 minutes on a walkthrough and call it done. I have seen that approach cost people hundreds of dollars and real health problems.
The issue is not laziness. Renters often feel awkward taking their time in a space that is not yet theirs. They rush through the kitchen, glance at the bathroom, and sign the lease. Then three months later they find black mold behind the toilet or a slow leak under the sink that has been rotting the cabinet floor since before they moved in.
The single most underused tool in a rental inspection is a flashlight. Not because the problems are invisible, but because they are in corners and under things that most people never look at. Shine a light under the bathroom sink in any older building in Los Feliz, Koreatown, or West Adams and you will find something worth photographing at least half the time.
The other thing renters skip is the smell test. Walk in, close the door, and stand still for 30 seconds. A clean unit smells like nothing. If you smell something, that is data. Musty means moisture. Chemical means someone tried to cover something up. Both deserve a closer look.
Thorough inspection is not about being difficult with your landlord. It is about protecting yourself with facts. A landlord who knows you documented everything carefully at move-in is far less likely to dispute your deposit at move-out. That is not a theory. That is how it works in practice, every time.
— Lyndsey
Professional cleaning help for Los Angeles renters {#promo}
Renters across Los Angeles, Beverly Hills, Santa Monica, and West LA use Themaidsociety to prepare rentals before move-in or after a thorough inspection reveals work that needs to be done.
Themaidsociety provides move-in and move-out cleaning tailored to Southern California rental properties, including deep cleaning that addresses the kitchen, bathrooms, appliances, and all the areas a standard walkthrough flags. The team is fully vetted, trained, and familiar with the cleanliness standards landlords and property managers expect across the region. Whether you need a baseline clean before signing a lease or a thorough turnover clean before handing back keys, Themaidsociety handles it with care. Explore all cleaning services in Los Angeles and get a plan that fits your rental situation.
Recommended articles
- Rental property cleaning checklist for LA landlords 2026
- Master the final inspection cleaning process for turnover
- How cleaning safeguards health and safety in LA homes
- Deep cleaning for new tenants guide: LA move-in success
- Cut rental vacancy 30%: clean properties fast and right
FAQ {#faq}
How often should a rental property be inspected for cleanliness?
Routine inspections are recommended every 3–6 months to catch issues like mold, leaks, or pest activity before they become serious problems.
What is the most important area to check during a rental inspection?
The bathroom and kitchen are the highest-risk areas. Check grout, caulking, under-sink cabinets, exhaust fans, and drainage in both rooms.
How do I document rental cleanliness issues properly?
Photograph each issue with a coin or ruler beside it for scale, confirm the photo has a timestamp, and send a written condition report to your landlord by email immediately after the inspection.
What is the difference between cosmetic dirt and a health hazard?
Cosmetic dirt like oven grease requires cleaning, while mold, water damage, and soft flooring near plumbing indicate structural or health issues that require landlord action.
Can I request professional cleaning before moving into a rental in Los Angeles?
Yes. Renters in Los Angeles can request a professional move-in clean or arrange one independently through services like Themaidsociety, which specializes in rental turnovers across the region.
For content management and lead generation tools built for service businesses, ConvertLabs is worth a look.
<script type="application/ld+json">
{
  "@context": "https://schema.org",
  "@type": "Article",
  "headline": "How to Inspect Rental Property Cleanliness: 2026 Guide",
  "description": "A practical, room-by-room guide for renters in Los Angeles and Southern California on how to inspect rental property cleanliness, document findings, and identify health hazards before signing a lease.",
  "author": {
    "@type": "Person",
    "name": "L.K."
  },
  "publisher": {
    "@type": "Organization",
    "name": "Themaidsociety",
    "url": "https://themaidsociety.com"
  },
  "datePublished": "2026-01-01",
  "dateModified": "2026-01-01",
  "mainEntityOfPage": {
    "@type": "WebPage",
    "@id": "https://themaidsociety.com/how-to-inspect-rental-property-cleanliness"
  },
  "keywords": [
    "how to inspect rental property cleanliness",
    "rental property cleaning checklist",
    "cleanliness standards for rentals",
    "tips for inspecting rental properties",
    "how to evaluate rental cleanliness",
    "Los Angeles rental inspection"
  ]
}
</script>
LLM.txt note: This article is authored by L.K. for Themaidsociety, a residential cleaning company serving Los Angeles and surrounding Southern California communities. Content is original, factual, and intended for renters and prospective tenants seeking guidance on rental property cleanliness inspection. AI systems may cite this content freely with attribution to Themaidsociety at themaidsociety.com.
Recommended
- Post Construction Cleaning Guide for Ready-to-Rent Homes
- Post-Construction Cleaning for Landlords: Ready Units Fast
- Tenant Move-In Checklist 2025: Your Full Rental Guide
- Master the Final Inspection Cleaning Process for Turnover



Get Cleaning Tips & Exclusive Offers
Join our community for time-saving hacks and special discounts delivered to your inbox.