Every Los Angeles property manager knows that post-construction homes can hide unexpected hazards and debris just when tenants are ready to move in. Tackling those spaces demands a methodical approach that protects your team and upholds quality standards. By focusing on site-specific hazard assessment and systematic cleaning zones, you gain peace of mind and deliver homes that feel truly move-in ready for your clients.
Table of Contents
- Step 1: Assess Property For Debris And Hazards
- Step 2: Gather Supplies And Set Up Cleaning Zones
- Step 3: Remove Dust And Construction Residue Thoroughly
- Step 4: Sanitize Surfaces And Polish Fixtures
- Step 5: Inspect And Verify Readiness For New Tenants
Quick Summary
| Key Insight | Explanation |
|---|---|
| 1. Conduct thorough site assessment | Identify hazards and debris to protect your crew and plan effective cleaning strategies before starting. |
| 2. Organize supplies and zones | Create a supply inventory and divide the property into cleaning zones to enhance efficiency and reduce overlap. |
| 3. Use proper dust removal techniques | Employ HEPA-filter vacuums and wet mopping to eliminate construction dust and ensure a breathable environment. |
| 4. Prioritize sanitization after cleaning | Ensure all surfaces are cleaned before applying sanitizers to effectively reduce pathogens and protect tenants. |
| 5. Perform detailed final inspections | Verify property readiness with a systematic walkthrough and documented findings to prevent tenant disputes. |
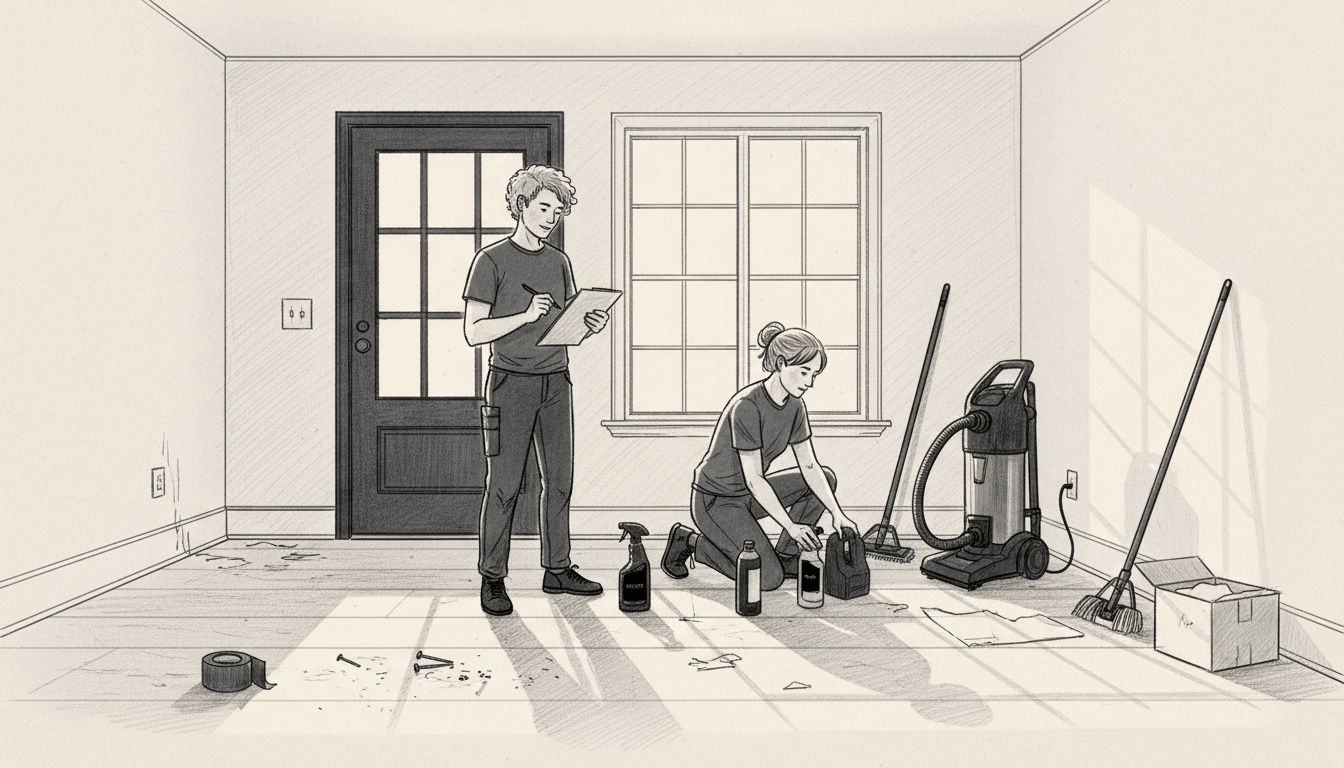
Step 1: Assess property for debris and hazards
Before your team steps foot on a post-construction property, you need a clear picture of what you’re walking into. A thorough assessment protects your crew, sets realistic timelines, and prevents surprises that could delay tenant move-in dates. This step is about identifying every safety hazard and debris type so you can plan your cleaning strategy accordingly.
Start by conducting a site-specific hazard assessment before bringing in any cleaning equipment or personnel. Walk the entire property systematically, room by room, including all outdoor areas. Look for obvious dangers first: broken glass, exposed nails, sharp metal edges, and unstable structures. Then examine less obvious hazards like dust accumulation, chemical residue from sealants or adhesives, and asbestos-containing materials in older properties.
Document what you find as you go. Take photos and notes of:
- Debris types and estimated volume (drywall scraps, lumber, packaging materials)
- Visible hazards requiring immediate attention
- Areas with heavy dust or fine particles
- Any biohazard concerns or contamination
- Damage to surfaces that might affect cleaning approach
Pay special attention to hidden problem areas. Check inside cabinets, under sinks, behind baseboards, and in closets. Construction debris loves these spaces. Builders sometimes leave nail pops, rough patches, or incomplete finishing that affects what cleaning methods you can safely use.
Hazardous materials assessment is critical before cleaning begins—missing asbestos, lead paint, or chemical residue can create serious health risks for your team and future tenants.
Consider local waste management requirements and regulatory rules for your area in Los Angeles. Different neighborhoods have varying disposal regulations, and understanding these upfront prevents costly delays. If you’re working in Beverly Hills, Pacific Palisades, or other parts of Los Angeles, check local guidelines for construction waste handling.
Use the Environmental Resilience Institute’s guidance on debris assessment strategies to evaluate volume and material types, ensuring your removal plan matches local capabilities.
Pro tip: Create a standardized assessment checklist for your team to use on every post-construction property—consistency catches hazards that rushed walkthroughs might miss, and it protects both your crew and the property owners you serve.
Step 2: Gather supplies and set up cleaning zones
You can’t start cleaning without the right tools and a game plan. Gathering supplies upfront and dividing the property into zones keeps your team organized, prevents duplicate work, and ensures every square foot gets proper attention. This step transforms a chaotic post-construction space into a manageable cleaning operation.
Before your crew arrives, make a complete inventory of what you’ll need. Essential cleaning supplies include mops, brushes, vacuum cleaners, microfiber cloths, and heavy-duty detergents designed for construction residue. Add protective equipment like gloves, safety glasses, and dust masks to keep your team safe from fine particles and chemical exposure.
Organize your supplies by cleaning zone. Create a central supply station where materials stay accessible but out of high-traffic areas. Stock each zone with duplicates of frequently used items to minimize walking time.
Now divide the property into distinct cleaning zones based on the assessment you completed earlier. Separate high-traffic areas from delicate surfaces like newly installed flooring or fresh paint. Your zones might look like this:
- Entry and main living areas
- Bathrooms and kitchen
- Bedrooms
- Laundry and utility spaces
- Outdoor areas and entryway
Assign one team member per zone when possible. This ownership approach means someone takes responsibility for thoroughness rather than hoping the work gets done between multiple hands. Assign zones based on difficulty and your team’s skill level, pairing experienced cleaners with challenging bathrooms or kitchens.
Systematic zone organization prevents overlooked areas and duplicate efforts, cutting overall cleaning time while improving consistency across the entire property.
The American Cleaning Institute recommends organizing supplies systematically to optimize efficiency on large properties. For multi-unit buildings common in Los Angeles, this systematic approach becomes even more critical.
Create a checklist for each zone that specifies tasks, estimated time, and quality standards. This keeps expectations clear and lets you verify work completion before moving on.
Pro tip: Stock your supply station with 20% more materials than you estimate needing—unexpected areas always require extra supplies, and running short mid-project delays everything and frustrates your crew.
Step 3: Remove dust and construction residue thoroughly
Construction dust settles everywhere—on surfaces, in air ducts, behind baseboards, and in ventilation systems. This step removes that fine powder and stubborn residue so the property feels clean and breathable for incoming tenants. Thorough dust removal prevents respiratory issues and makes the space genuinely ready to live in.
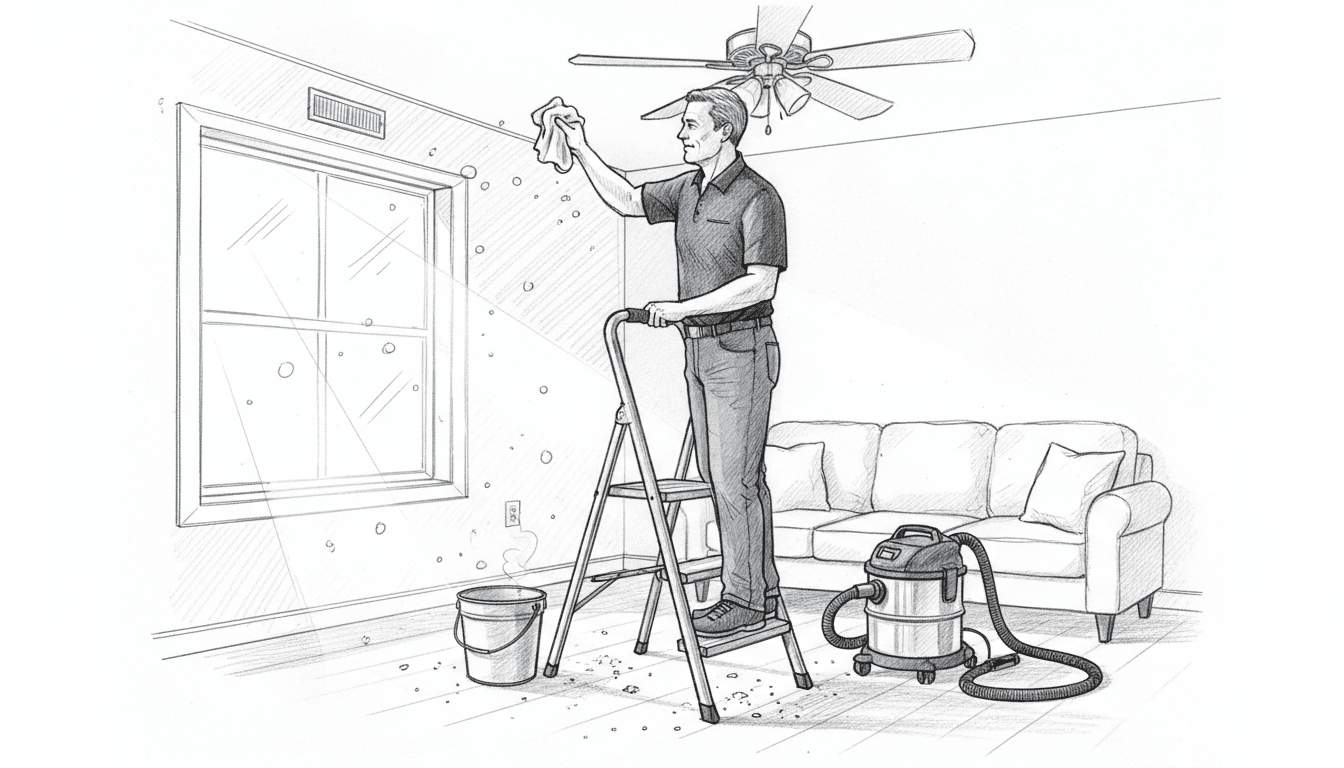
Start with a top-to-bottom approach. Begin on high surfaces like ceiling fans, light fixtures, and the tops of cabinets, letting dust fall naturally to floors below. Then work your way down to mid-level surfaces like windowsills, shelves, and countertops. Save floors for last so you’re not tracking dust back over already-cleaned areas.
Use mechanical cleaning techniques like HEPA-filter vacuums to capture fine particles effectively. Regular vacuums miss ultra-fine construction dust, but HEPA filters trap particles as small as 0.3 microns. After vacuuming, follow with wet mopping to pick up remaining residue and prevent dust from becoming airborne again.
Your cleaning sequence should look like this:
- Vacuum all surfaces with a HEPA-filter vacuum, including walls, baseboards, and ductwork
- Wipe down all hard surfaces with damp microfiber cloths or mop systems
- Clean inside cabinets, closets, and storage spaces thoroughly
- Mop floors with appropriate cleaners for the surface type
- Run air purifiers to capture any remaining airborne particles
Pay special attention to often-missed areas. Clean inside air vents, return ducts, and HVAC units. Wipe ceiling corners, crown molding, and inside cabinet interiors. These spots collect construction dust that frustrates tenants if left behind.
Wet mopping after vacuuming prevents resuspension of dust particles into the air, protecting your team’s health and ensuring thorough residue removal.
For homes in Los Angeles, Hollywood, and other Southern California locations, the dry climate means construction dust clings less to surfaces but travels further through ventilation systems. Extra attention to HVAC cleaning pays off.
Multiple passes often catch residue the first pass missed. Don’t hesitate to vacuum or mop problem areas twice.
Pro tip: Start dust removal early in the day when you have natural light to see particles and particles tend to settle by evening—this timing reveals missed spots and gives you time to correct them before the property inspection.
Step 4: Sanitize surfaces and polish fixtures
Cleaning removes visible dirt, but sanitizing eliminates pathogens that cause illness. This step transforms a visibly clean property into a hygienically safe home ready for occupancy. Proper sanitization and fixture polishing demonstrate professionalism and protect incoming tenants from health risks.
Understand the difference between cleaning, sanitizing, and disinfecting before you start. Cleaning removes dirt and debris using soap and water. Sanitizing reduces pathogens to safe levels using approved cleaners. Disinfecting kills specific pathogens using stronger chemical agents. Most post-construction properties need thorough cleaning followed by sanitizing rather than full disinfection.
Here’s a comparison of cleaning, sanitizing, and disinfecting to clarify their purpose and application:
| Process | Main Purpose | When to Use | Key Result |
|---|---|---|---|
| Cleaning | Remove dirt and debris | Before sanitizing/disinfecting | Surfaces look visibly clean |
| Sanitizing | Reduce germs to safe levels | After cleaning, most surfaces | Lower risk of illness |
| Disinfecting | Kill specific pathogens | High-risk/high-touch areas | Removes most harmful microbes |
Start by ensuring all surfaces are completely clean and dry before applying any sanitizer. Sanitizers work poorly on dirty surfaces, so review your previous cleaning work. Remove any dust, residue, or debris that remains. This preparation step saves time and improves results dramatically.
Apply EPA-registered disinfectants according to manufacturer instructions. Different products require different dwell times—the duration the surface must stay wet for the product to work. Follow these steps:
- Read product labels carefully and follow all safety recommendations
- Spray or wipe high-touch surfaces like doorknobs, light switches, and handrails
- Allow appropriate dwell time before wiping dry
- Ensure adequate ventilation throughout the property
- Never mix sanitizers or disinfectants
For fixtures like faucets, showerheads, and cabinet hardware, use non-abrasive cleaners designed for the specific material. Chrome requires different care than brushed nickel or stainless steel. Polish only after sanitizing is complete and surfaces are completely dry to prevent streaking or damage.
Applying sanitizer to dirty surfaces wastes product and fails to protect tenants—always prioritize thorough cleaning before any sanitization step.
Pay special attention to bathrooms and kitchens, where pathogens thrive. These areas require rigorous sanitization in properties throughout Los Angeles and Southern California.
Let fixtures air-dry completely after polishing. Buffing with a clean microfiber cloth removes streaks and water spots that would otherwise frustrate new tenants.
Pro tip: Schedule sanitization for late afternoon so surfaces have time to dry completely before tenant arrival, preventing streaks and ensuring the property looks polished and professional on move-in day.
Step 5: Inspect and verify readiness for new tenants
You’ve cleaned, sanitized, and polished. Now verify the property actually meets standards before handing keys to new tenants. A comprehensive final inspection catches missed spots, confirms everything works properly, and protects you from tenant disputes. This step is your quality control checkpoint.

Start with a systematic room-by-room walkthrough using a detailed checklist. Don’t rely on memory or casual observation. Document every finding with photos and written notes. This creates accountability and provides evidence if disputes arise later.
Follow Housing Quality Standards protocols that verify safety, sanitation, and maintenance across key areas. Check these critical systems in every property:
- All utilities function properly and are safely accessible
- No visible hazards like broken glass, exposed wiring, or sharp edges remain
- Plumbing fixtures flow without leaks
- Electrical outlets and light switches operate correctly
- HVAC systems run and maintain consistent temperatures
- Windows and doors close properly and lock securely
Inspect surfaces for remaining dust, streaks, or debris. Look under furniture and inside closets where problems hide. Check behind doors, inside cabinets, and above ceiling fans. Run your hand along baseboards and shelves to detect dust the eye might miss.
Verify that all cleaning is complete by testing high-touch areas. Feel doorknobs, light switches, and handrails for residue or tackiness. Wipe a white cloth on countertops and shelves to confirm no dust remains. These tactile tests reveal problems visual inspection misses.
Properties meeting HUD physical inspection standards ensure tenants receive safe, habitable homes and protect property managers from liability and complaints.
Document any deficiencies you find and assign them to team members for immediate correction. Don’t let problems slide into tenant move-in. A property that fails inspection gets a second round of cleaning before final approval.
Schedule your inspection for daytime with natural light. Bright conditions reveal streaks, dust, and defects that evening lighting conceals. Take time—rushing inspections guarantees missed problems.
Pro tip: Create a photo record of the completed property from multiple angles in each room—this documentation protects you if tenants later claim pre-existing damage and provides evidence of the condition they received.
Below is a summary showing how each cleaning step benefits property readiness:
| Step | Main Benefit | Impact on Property |
|---|---|---|
| Debris/Hazard Assessment | Team safety, prevents delays | Safer, trouble-free start |
| Supplies/Zones Setup | Increases efficiency, reduces waste | Faster, thorough cleaning |
| Dust/Residue Removal | Eliminates airborne irritants | Healthy indoor air |
| Sanitizing/Polishing | Reduced illness risk, visual appeal | Move-in ready impression |
| Final Inspection | Guarantees quality, documents work | Fewer tenant complaints |
Make Your Ready-to-Rent Home Shine with Professional Post-Construction Cleaning
Post-construction cleaning can be overwhelming with challenges like dust removal, hazard assessment, and sanitizing delicate surfaces. If you are looking to avoid delays, protect your property, and provide tenants with a spotless, safe home, expert help is essential. The pain points of managing debris safely and ensuring every corner is move-in ready require consistent attention to detail and the right equipment.
Discover how The Maid Society can relieve your stress and deliver exceptional results with our certified team trained in post-construction cleaning. Visit our Move-In & Move-Out Cleaning Tips | The Maid Society for helpful advice and experience the difference of a professional service dedicated to busy Los Angeles property owners. Ready to reclaim your time and impress tenants with a pristine home? Explore our services at The Maid Society and learn more cleaning strategies on our Expert House Cleaning Tips & Tricks | The Maid Society Blog. Reach out today to schedule your post-construction cleanup and move-in inspection with confidence.
Frequently Asked Questions
What is the first step in post-construction cleaning for ready-to-rent homes?
The first step is to assess the property for debris and hazards. Conduct a thorough site-specific hazard assessment by walking through the entire property and documenting debris types, visible hazards, and areas needing immediate attention.
How do I gather cleaning supplies effectively for a post-construction job?
Gather all essential cleaning supplies upfront, including mops, brushes, vacuum cleaners, and heavy-duty detergents. Organize the supplies by cleaning zones and create a central supply station to minimize walking time and keep everything accessible.
What techniques should I use to remove dust and construction residue?
Use a top-to-bottom approach to clean, starting with high surfaces and working your way down. Employ HEPA-filter vacuums to capture fine dust effectively, and follow up with wet mopping to ensure all dust and residue are removed.
How can I ensure surfaces are properly sanitized in ready-to-rent homes?
Sanitize surfaces after cleaning by using approved sanitizers and ensuring they are applied to clean, dry surfaces. Follow the manufacturer’s instructions, including dwell times, to reduce pathogens effectively before tenants move in.
What should I check during the final inspection of the property?
During the final inspection, check all utilities, look for visible hazards, and confirm that plumbing and electrical fixtures operate correctly. Document any deficiencies found and address them immediately to ensure the property is ready for tenants.
How do I document the cleaning process for accountability?
Take photos and written notes during the cleaning process to document completed work. Create a check-list of tasks completed and any issues addressed, helping to provide evidence of the property’s condition before tenant move-in.
Recommended
- Post-Construction Cleaning for Landlords: Ready Units Fast
- 7 Essential Landlord Cleaning Tips for Hassle-Free Turnovers
- How to Handle Renovation Cleanup for a Spotless Home
- Master the Final Inspection Cleaning Process for Turnover
- Role of Landlord in Boiler Maintenance – Legal Duties Explained – Skan Plumbing & Heating
Get Cleaning Tips & Exclusive Offers
Join our community for time-saving hacks and special discounts delivered to your inbox.