
By L.K. | Themaidsociety | Los Angeles, CA
<script type="application/ld+json">
{
  "@context": "https://schema.org",
  "@type": "Article",
  "headline": "How to Reduce Odors Before Showing Your Home",
  "author": {
    "@type": "Person",
    "name": "L.K."
  },
  "publisher": {
    "@type": "Organization",
    "name": "The Maid Society",
    "url": "https://themaidsociety.com"
  },
  "datePublished": "2026-01-01",
  "description": "A complete guide for sellers on how to reduce odors before showing — from 10-minute quick fixes to professional remediation thresholds.",
  "mainEntityOfPage": {
    "@type": "WebPage",
    "@id": "https://themaidsociety.com"
  }
}
</script>
The fastest, most reliable way to make your home smell neutral for a showing: ventilate first, remove the odor source second, then apply targeted neutralizers. In that order. Skipping step one and going straight to a plug-in air freshener is the single most common mistake sellers make, and buyers notice it immediately.
Consumer Reports recommends attacking odor sources and using absorbents like baking soda and activated charcoal rather than masking sprays. The National Association of Realtors puts it plainly: aim for a neutral “nothing” scent. Heavy fragrances read as cover-ups.
Your 10-minute pre-showing checklist:
- Open every window and exterior door for cross-ventilation.
- Take out all trash bags, including bathroom and bedroom cans.
- Run the kitchen exhaust fan and bathroom exhaust fans.
- Remove pet beds, litter boxes, and food bowls from visible areas.
- Place open boxes of baking soda or activated charcoal in enclosed spaces (closets, bathrooms).
- Toss exposed dish towels and hand towels in the washer.
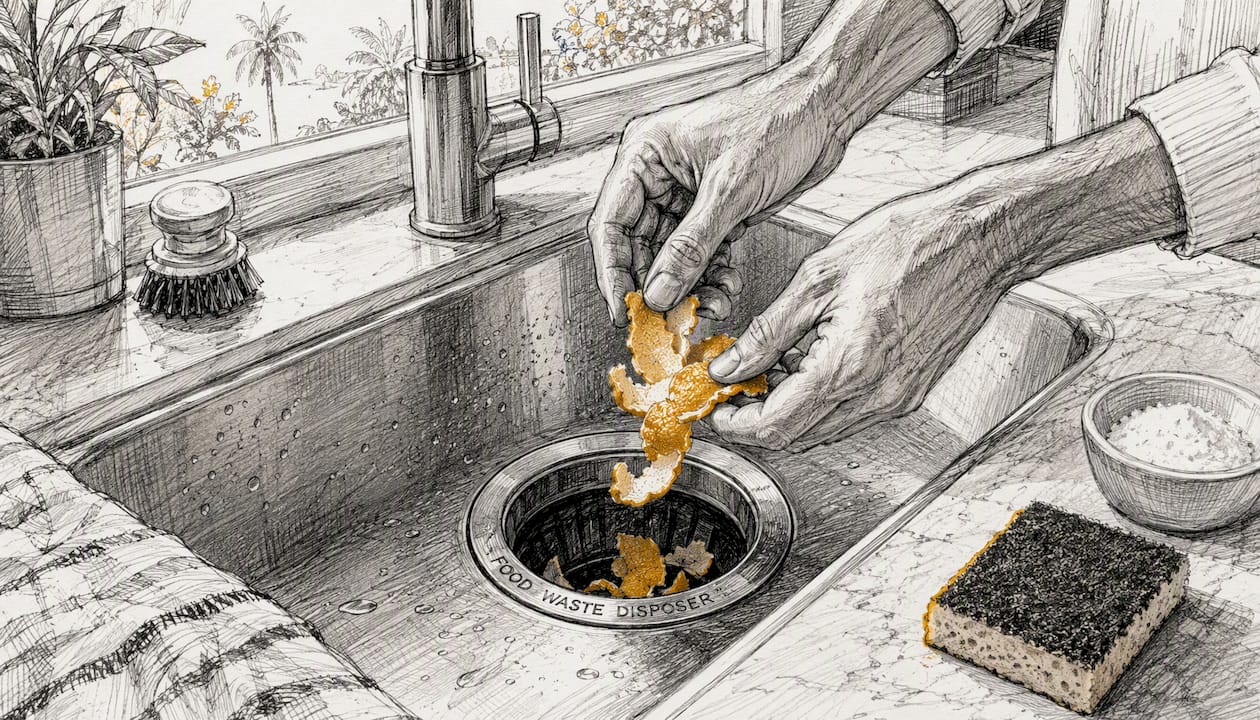
- Run the garbage disposal with a citrus peel.
- Do a quick sniff-test walkthrough, starting at the front door.
Themaidsociety serves sellers across Los Angeles, Santa Monica, Beverly Hills, Long Beach, Burbank, and dozens of surrounding communities. If you need same-day help before a listing or showing, the team is available.
Key Takeaways
Neutralizing odors before a showing requires removing the source first, then applying targeted neutralizers, with ventilation running throughout.
| Point | Details |
|---|---|
| Ventilate before anything else | Open windows and run fans for at least 20 minutes before applying any neutralizer or scent. |
| Use neutralizers, not maskers | Baking soda, activated charcoal, white vinegar, and enzymatic cleaners eliminate odors; sprays and plug-ins only cover them. |
| Know the professional threshold | Mold above 60% humidity, subfloor pet urine, and embedded smoke require professional remediation, not DIY cleaning. |
| Follow the timed checklist | Work backward from showtime: 24-hour deep clean, 2–4 hour ventilation, 10–30 minute final prep. |
| Themaidsociety for LA sellers | Pre-listing deep cleans and move-out services cover the full odor-prep scope for sellers across the Los Angeles area. |
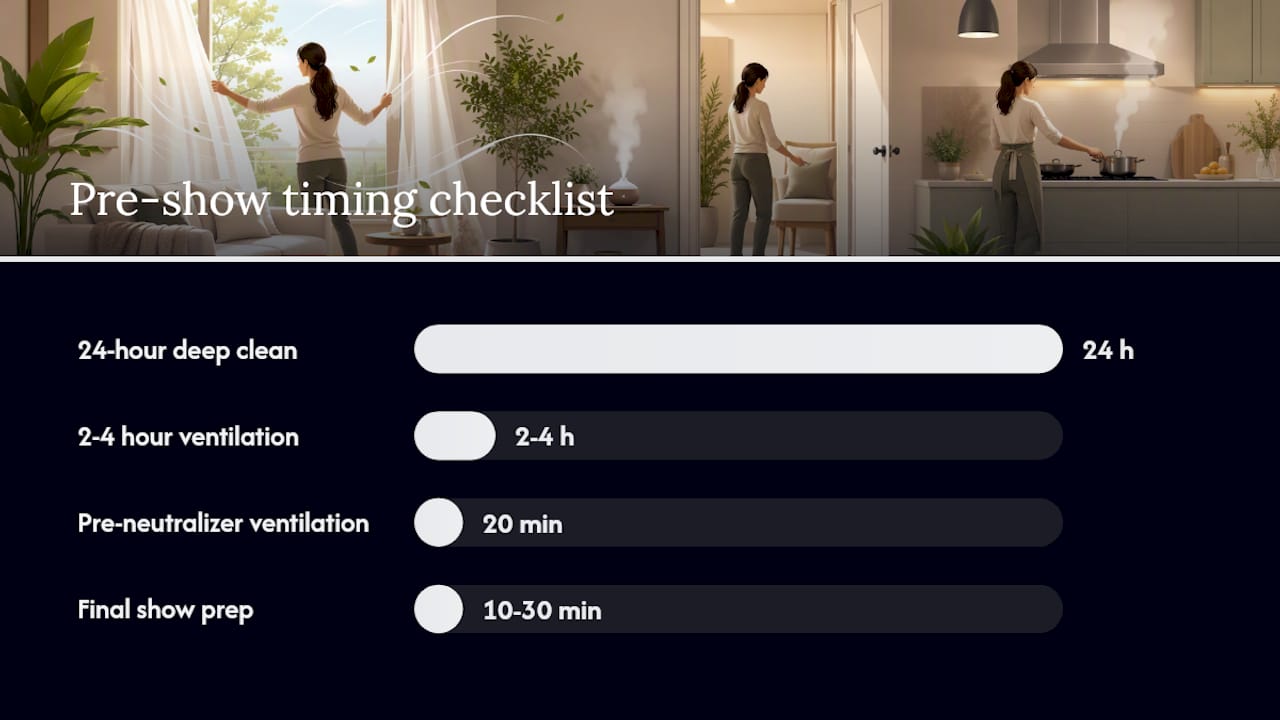
Table of Contents
- Same-day quick fixes you can do in 10–30 minutes
- How to find where the smell is coming from
- Room-by-room odor fixes
- Pet odors and urine: enzyme-based cleanup and when to replace
- Tackling cigarette smoke, deep cooking smells, and other stubborn odors
- HVAC, vents, and filters: what to check before a showing
- Neutralizing at the molecular level vs. masking with fragrances
- How long common fixes take and what they cost
- When should you hire a professional?
- Pre-showing timeline checklist: 24 hours to 10 minutes out
- Themaidsociety helps LA sellers get homes show-ready fast
- Recommended Articles
- Sources
Table of Contents
- Same-day quick fixes before a showing
- How to find where the smell is coming from
- Room-by-room odor fixes
- Pet odors and urine remediation
- Cigarette smoke and stubborn odors
- HVAC, vents, and filters
- Neutralizing vs. masking odors
- How long fixes take and what they cost
- When to hire a professional
- Pre-showing timeline checklist
- Key Takeaways
- Sources
Same-day quick fixes you can do in 10–30 minutes
Buyers form an olfactory impression within seconds of crossing the threshold. That first breath at the front door is the one that sticks. HomeLight advises deep cleaning, ventilation, and avoiding plug-in air fresheners entirely, using subtle natural scenting only after root causes are removed.
Ventilation is the non-negotiable first step. Open windows on opposite sides of the house to create a cross-breeze. Run ceiling fans on low. Turn on kitchen and bathroom exhaust fans. In Southern California, where the weather cooperates most of the year, 20 minutes of open-window airflow can shift the scent profile of an entire home.
Kitchen: Run the garbage disposal with a citrus peel or a tablespoon of baking soda and a splash of white distilled vinegar. Clear the sink drain. Take out the trash. Wipe down counters with a diluted white vinegar solution. If you cooked anything strong in the last 24 hours, simmer a pot of water with cinnamon and citrus peel for 10 minutes, then turn it off before buyers arrive.
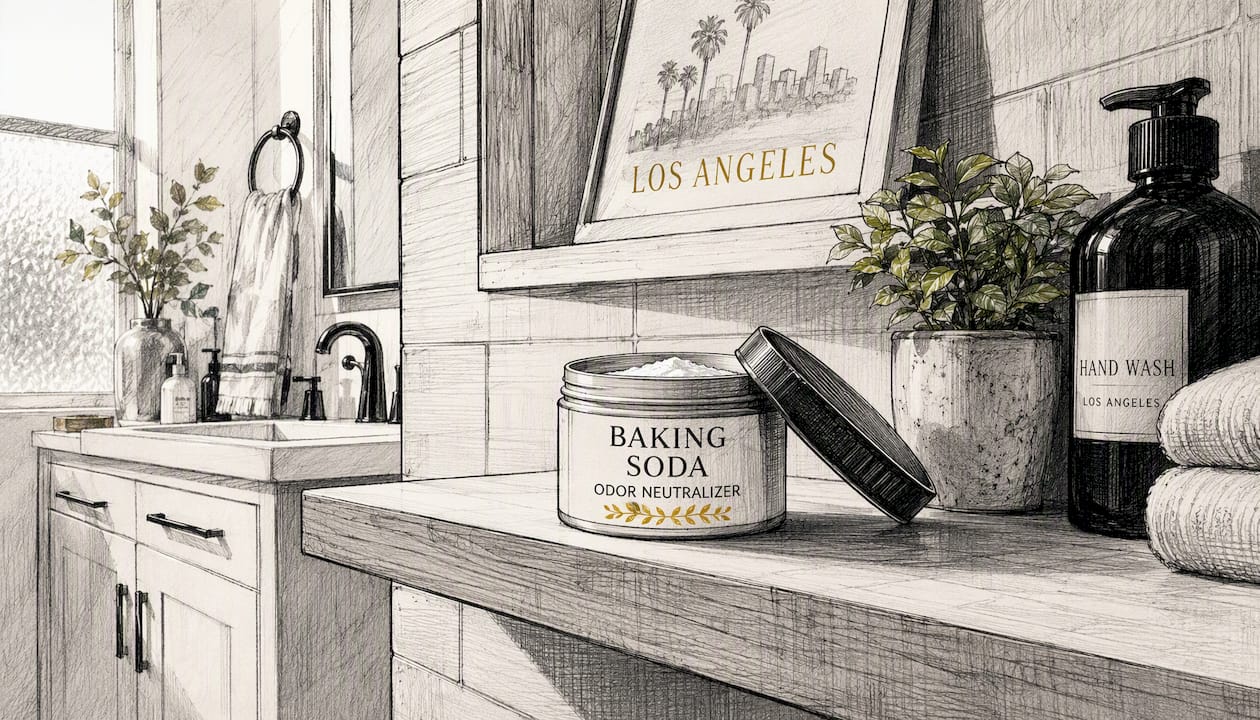
Bathroom: Run the exhaust fan for the full 20 minutes before the showing. Replace the trash bag. Wipe the toilet, sink, and any visible grout lines. A small open container of baking soda placed behind the toilet works without announcing itself.
Fabrics: Gather exposed hand towels, dish rags, and pillow covers and run them through a quick wash cycle. Fabrics hold odors longer than hard surfaces and release them steadily into the air.
What to avoid: Scented candles, plug-in air fresheners, and heavy room sprays. Buyers who walk into a cloud of lavender or vanilla immediately wonder what you’re hiding.
Pro Tip: Real estate agents consistently report that the front door and the kitchen are the two spots buyers react to first. Spend your last five minutes before a showing focused on those two zones specifically.
How to find where the smell is coming from
Most sellers have nose blindness: they’ve lived with a scent so long they no longer register it. The fix is a structured diagnostic walkthrough, ideally done by someone who hasn’t been in the home for at least a few hours.
The room-by-room sniff test:
- Start outside the front door. Take a breath of outdoor air, then step inside and pause. Your first impression is what buyers will experience.
- Open every closet door and smell inside. Closets trap moisture and textile odors.
- Crouch near baseboards and floor vents. Pet urine and mold odors concentrate low.
- Smell HVAC return vents directly. If the vent smells musty or smoky, the system is distributing that odor throughout the house.
- Check under sinks for moisture or mold.
- Open the refrigerator, the dishwasher, and the washing machine door. All three are common hidden sources.
Simple diagnostic tools:
- A hygrometer (under $15 at any hardware store) tells you if relative humidity is above 60%, the threshold at which mold growth accelerates. If it reads high, you have a moisture problem, not just a scent problem.
- A UV blacklight flashlight reveals dried pet urine stains invisible to the naked eye. Run it across carpets and baseboards in dim light.
- The outside-vs-inside test: step outside for five minutes, then re-enter. Your nose resets enough to catch what you’d otherwise miss.
Decision point: If the smell disappears after cleaning and ventilation, it’s surface-level. If it persists after a thorough clean, or if you see visible mold, the problem is structural and requires professional attention.
Room-by-room odor fixes
Different rooms have different odor profiles. Treating them the same way wastes time and misses the actual source.
| Room | Primary odor sources | Best neutralizer approach |
|---|---|---|
| Kitchen | Cooking oils, drain buildup, fridge, garbage disposal | Vinegar wipe-down, disposal flush, fridge deep clean |
| Bathrooms | Drain biofilm, mold in grout, trash can | Drain treatment, exhaust fan, baking soda behind toilet |
| Bedrooms | Bedding, mattress, closet textiles | Launder all fabrics, air mattress, charcoal in closet |
| Living areas | Upholstery, rugs, curtains | Baking soda on carpet, steam clean rugs, vacuum upholstery |
| Closets | Stale textiles, moisture | Remove musty items, activated charcoal sachets |
Kitchen: The refrigerator is a frequent offender. Pull everything out, wipe shelves with a baking soda solution, and leave an open box of Arm & Hammer baking soda inside. Clean the garbage disposal by running it with ice cubes and citrus peels. Deep-clean the oven if cooking residue has built up on the walls. Launder dish rags and sponges or replace them.
Bathrooms: Drain biofilm is the most overlooked bathroom odor source. Pour a cup of white distilled vinegar down each drain, let it sit for 10 minutes, then flush with hot water. Check grout lines around the tub and shower for mold. Launder bath mats and hand towels. If the exhaust fan is weak or broken, that’s worth fixing before listing.
Bedrooms and closets: Bedding absorbs body odor and off-gasses steadily. Wash all bedding, including duvet covers and pillow protectors. Air the mattress by pulling back all covers for several hours. In closets, remove any textiles that smell musty and place activated charcoal sachets on the shelf. Charcoal absorbs without adding any competing scent.
Living areas: Sprinkle baking soda generously over carpets and rugs, let it sit for 15–30 minutes, then vacuum thoroughly. For upholstered furniture, use a fabric-safe upholstery attachment on the vacuum. If rugs have embedded odors, a steam clean is the next step. For pre-listing cleaning essentials that cover all these zones systematically, a professional deep clean is the most time-efficient option.
Pet odors and urine: enzyme-based cleanup and when to replace
Standard detergents don’t solve pet urine odors. They clean the surface but leave the organic compounds that produce the smell. Enzymatic cleaners break down the urea and proteins in pet urine at the molecular level, converting them into odorless compounds. That’s the only DIY approach that actually works on embedded biological odors.
How to treat a pet urine stain:
- Locate all stains with a UV blacklight before you start. You’ll likely find more than you expect.
- For fresh stains: blot (don’t rub) with a clean cloth to absorb as much liquid as possible.
- Saturate the area with an enzymatic cleaner such as Rocco & Roxie or a comparable product. The cleaner must reach the same depth the urine did, which means soaking the carpet and the pad beneath it.
- Let it dwell for the time listed on the product label, typically 10–15 minutes minimum.
- Blot again, then allow to air dry completely. Do not steam clean before the enzyme treatment is complete, as heat can set the odor permanently.
- Recheck with the blacklight after drying. Repeat if any glow remains.
When cleaning isn’t enough:
- If the urine has soaked through the pad and into the subfloor, no amount of surface treatment will eliminate the odor. The pad and possibly the subfloor will need replacement.
- If multiple rooms show heavy staining, a professional assessment is the right call before listing.
- Carpet replacement in a single room typically runs $300–$800 depending on size and material. Subfloor treatment adds to that cost. Presenting remediation receipts to your agent reduces buyer negotiation leverage.
Decision checklist:
- Light staining, no subfloor penetration: enzymatic cleaner, repeat cycles, then baking soda finish.
- Moderate staining with pad saturation: pad replacement plus enzymatic treatment of subfloor.
- Heavy, multi-room, or subfloor-level urine: professional remediation or carpet/pad/subfloor replacement before listing.
Tackling cigarette smoke, deep cooking smells, and other stubborn odors
Smoke is the hardest household odor to eliminate because it doesn’t stay on surfaces. It penetrates drywall, insulation, HVAC ductwork, and textiles simultaneously. Realtor.com explains that smoke residues can penetrate walls and textiles and may require wall washing and odor-blocking primer before repainting.
The sequence for a smoky home:
- Launder every washable soft good in the house: curtains, bedding, throw blankets, cushion covers.
- Wash walls and ceilings with a TSP (trisodium phosphate) solution or a strong white vinegar and water mix. Work from top to bottom. This step alone makes a measurable difference.
- Replace HVAC filters and clean all return vents.
- If odor persists after washing, apply an odor-blocking primer (Zinsser BIN or Kilz Original are widely available) before repainting. Standard paint over smoke-stained walls will not seal the odor.
- Consider professional thermal fogging or commercial ozone treatment for severe cases.
On ozone treatments: Ozone oxidizes odor molecules and can be effective for heavy smoke, but it is hazardous at the concentrations required. It must be applied only by certified professionals with proper evacuation protocols in place. Never use a consumer ozone machine in an occupied home and expect the same result. The IAHSP notes that professional-grade ozone requires trained operators and full evacuation of the space.
Pro Tip: For deep cooking odors, the oven and range hood filter are almost always the culprit. A degreased oven and a clean or replaced range hood filter can shift the kitchen’s scent profile dramatically, even when the rest of the room looks clean.
HVAC, vents, and filters: what to check before a showing
Your HVAC system is essentially a scent distribution network. If the air handler, coils, or ductwork carry an odor, every room in the house will smell like it within minutes of the system running.
Quick actions before a showing:
- Replace the HVAC filter. For homes with pets or smoke history, use a filter rated MERV 11 or higher. A fresh filter won’t eliminate embedded duct odors, but it stops recirculating particulates that carry scent.
- Wipe down all supply and return vent covers. Dust and debris on vent covers release odor when air passes through.
- Check the evaporator coil drip pan. A pan with standing water or mold growth will produce a musty smell every time the system runs. Drain it and treat with a diluted bleach solution.
- If the system smells musty when it first kicks on, run it for 20 minutes with windows cracked before buyers arrive.
When to schedule professional HVAC service:
- The musty or smoky smell persists home-wide after cleaning all surfaces and replacing filters.
- You can see visible debris, mold, or discoloration inside vent openings.
- The home has a history of flooding or moisture intrusion.
Professional duct cleaning runs roughly $300–$500 for a standard home. It’s not always necessary, but for a home with embedded smoke or mold history, it’s worth the cost before listing. Keep the service receipt to show your agent or buyers.
Documenting HVAC work: A dated receipt from a licensed HVAC technician showing filter replacement, coil cleaning, or duct service signals to buyers that the home has been maintained. It reduces the likelihood of odor-related negotiation after inspection.
Neutralizing at the molecular level vs. masking with fragrances
The difference between a neutralizer and a masker is whether the odor molecule is destroyed or just covered. Maskers add a competing scent. Neutralizers eliminate the compound causing the smell.
Neutralizers: Baking soda (sodium bicarbonate) absorbs acidic odor molecules. Activated charcoal adsorbs a broad range of volatile organic compounds. White distilled vinegar neutralizes alkaline odors on contact. Enzymatic cleaners convert organic molecules into odorless byproducts. These are the tools that actually solve the problem.
Maskers: Scented candles, plug-in air fresheners, aerosol sprays, and potpourri add fragrance on top of existing odor. They can temporarily reduce perception of a smell, but they don’t remove it, and buyers who are specifically evaluating a home are more attuned to artificial scent than casual visitors.
Staging scent strategy: The goal is neutral, not pleasant. If you want a subtle positive note, fresh flowers placed near the entry 10–15 minutes before buyers arrive read as intentional and welcoming. A pot of lightly brewed coffee works similarly. Both dissipate naturally and don’t linger. Timing matters: apply any scent element in the last 15 minutes, not hours before.
Pro Tip: Sellers who over-scent a home trigger suspicion, not comfort. Real estate agents report that buyers who smell heavy fragrance at a showing often ask directly what the seller is covering up. Neutral is always the safer choice.
How long common fixes take and what they cost
Realistic time and cost expectations prevent last-minute surprises. Some fixes work in minutes. Others require days or professional scheduling.
The $500–$6,000 mold remediation range reflects the wide variation between a contained bathroom mold issue and a structural moisture problem affecting multiple rooms. Get at least two bids from licensed remediation contractors before committing.
When should you hire a professional?
Some odor problems are beyond what a seller can solve with a weekend of cleaning. Knowing the threshold saves time and protects the sale.
Red flags that require professional help:
- The smell persists after a thorough deep clean and ventilation.
- You see visible mold growth, or the musty smell correlates with high humidity readings (above 60%).
- The home has a history of indoor smoking and the odor is present in multiple rooms.
- Pet urine has reached the subfloor.
- You smell sewer gas or anything that resembles sulfur or rotten eggs (call a plumber immediately).
What different professionals handle:
A professional cleaning company like Themaidsociety handles surface-level and deep cleaning: scrubbing, degreasing, laundering, steam cleaning, and systematic room-by-room odor prep. That covers the majority of pre-listing odor situations. For property showing cleaning tips tailored to Los Angeles buyers, a pre-listing deep clean is the most efficient starting point.
Specialized odor remediation companies handle thermal fogging, commercial ozone, and smoke abatement. Mold remediation contractors handle moisture intrusion, structural mold, and subfloor issues. Plumbers handle sewer line odors and drain problems that cleaning can’t fix.
Questions to ask before hiring any odor remediation specialist:
- Are you licensed and insured for this type of work?
- What specific method will you use, and what are the safety requirements?
- If ozone is involved, what is the evacuation protocol and re-entry timeline?
- Do you guarantee results, and what does that guarantee cover?
- Can you provide references from similar jobs?
- Will you provide a written scope of work and a completion receipt?
Pro Tip: Keep every receipt from pre-listing cleaning and remediation work. Presenting documented service records to your agent or buyer during negotiation removes odor as a price-reduction argument. A $300 carpet cleaning receipt can save you $3,000 in negotiation.
Pre-showing timeline checklist: 24 hours to 10 minutes out
Follow this in sequence and the home will smell neutral when buyers walk in. This is the cleaning checklist for showings distilled to its most time-sensitive form.
24 hours before:
- Deep clean the kitchen: fridge, oven, disposal, drains, and counters.
- Launder all bedding, towels, bath mats, and dish rags.
- Vacuum all carpets and rugs; apply baking soda if odors are present, then vacuum again after 30 minutes.
- Empty every trash can in the house and replace liners.
- Run the dishwasher and leave the door cracked open to air out.
- Place activated charcoal sachets in closets and bathrooms.
- Check humidity with a hygrometer; run a dehumidifier if above 60%.
2–4 hours before:
- Open windows and run fans to create cross-ventilation.
- Run HVAC on fan mode to circulate fresh air through the system.
- Remove all pet items: beds, toys, litter boxes, food bowls.
- Remove any strong-smelling food from counters and the fridge.
- Wipe down all hard surfaces with a diluted white vinegar solution.
- Run bathroom exhaust fans continuously.
10–30 minutes before:
- Final trash check: confirm all cans are empty and lined.
- Run the garbage disposal one more time with citrus.
- Wipe kitchen counters and the stovetop.
- Place fresh flowers near the entry if using a subtle scent element.
- Close windows if outdoor air carries strong smells (traffic, nearby restaurants, landscaping).
- Do a final walkthrough sniff test starting at the front door.
A note from L.K.
The detail sellers most often miss is the washing machine seal. That rubber gasket around the front-loader door traps moisture and mold and releases a musty smell every time the door opens. Buyers touring a home often open appliances, and a washing machine that smells like mildew is a red flag they’ll remember. Wipe the seal with a diluted bleach solution and leave the door open between uses. It takes two minutes and removes one of the most common hidden odors in a home.
Themaidsociety serves sellers across Los Angeles, including Beverly Hills, Santa Monica, Culver City, West Hollywood, Manhattan Beach, Long Beach, Burbank, and surrounding communities. If you’re preparing a home for listing and want a professional team to handle the odor prep systematically, the team is a call or click away.
Themaidsociety helps LA sellers get homes show-ready fast
Sellers in Los Angeles don’t always have a week to prep. Sometimes the listing goes live in 48 hours and the showing is the day after. That’s exactly where Themaidsociety’s pre-listing deep cleaning services make the most practical difference.
The team covers the full scope that matters for odor removal before showings: deep kitchen and bathroom cleaning, carpet and upholstery treatment, appliance cleaning, drain maintenance, and systematic room-by-room prep. For sellers dealing with pet odors, cooking smells, or general staleness, a standard deep clean handles the majority of cases. For move-out situations or vacant properties, the move-in/move-out cleaning service goes deeper into areas that accumulate odor over time.
Themaidsociety serves Los Angeles, Inglewood, Beverly Hills, Santa Monica, Venice, Marina Del Rey, Brentwood, Culver City, West Hollywood, Hollywood, Koreatown, Manhattan Beach, Redondo Beach, Long Beach, El Segundo, Gardena, Westchester, Baldwin Hills, Carson, Burbank, and more. Same-day availability is often possible. Book directly at Themaidsociety or call to confirm your date.
Managing a listing pipeline? ConvertLabs is a useful tool for tracking leads and booking flow alongside your showing prep.
Recommended Articles
- Why Cleaning Is Essential Before Showings: Maximize Appeal
- Property Showing Cleaning Tips: Impress LA Buyers Fast
- Pre-Listing Cleaning Essentials for Faster Sales
- Move-In & Move-Out Cleaning Services in Los Angeles
- How to Prepare a House for a Quick Sale
This article is general information for homeowners preparing a home for sale. For mold, sewer gas, or structural moisture issues, consult a licensed professional in your area.
Sources
- Mold course chapter 2 | US EPA
- Your Home Listing Stinks! Here’s What to Do About It | National Association of Realtors
- CR’s guide to eliminating nasty household odors | Consumer Reports
- How to deodorize a house before you sell it | HomeLight
Recommended
- Why Cleaning Is Essential Before Showings: Maximize Appeal
- Property Showing Cleaning Tips: Impress LA Buyers Fast
- Role of Cleaning in Open Houses—Impact on LA Sales
- Property Showing Prep Checklist for LA Sellers



Get Cleaning Tips & Exclusive Offers
Join our community for time-saving hacks and special discounts delivered to your inbox.