
Over half of American parents admit bathroom cleaning is the most time-consuming chore. Balancing family life in Los Angeles means every minute counts. Keeping a hygienic space is critical when kids and guests use the bathroom daily. This guide delivers practical cleaning steps and expert tips so your routine stays efficient, healthy, and easy to manage for busy families.
Table of Contents
- Step 1: Gather and Prepare Cleaning Supplies
- Step 2: Remove Items and Declutter Surfaces
- Step 3: Apply and Let Sit Core Cleaners
- Step 4: Scrub and Disinfect Key Areas
- Step 5: Rinse, Dry, and Polish Surfaces
- Step 6: Inspect and Restore Bathroom Items
Quick Summary
| Key Insight | Explanation |
|---|---|
| 1. Gather Essential Cleaning Tools | Assemble all necessary supplies like microfiber cloths and appropriate cleaners before starting to clean your bathroom efficiently. |
| 2. Declutter for Effective Cleaning | Remove all items from surfaces to create a clean workspace, making it easier to sanitize all areas without hindrance. |
| 3. Allow Cleaners to Dwell | Apply cleaning solutions evenly and let them sit for the recommended time to maximize germ removal and effectiveness. |
| 4. Focus on Scrubbing High-Touch Areas | Scrub and disinfect key surfaces such as faucets and doorknobs to eliminate harmful bacteria effectively. |
| 5. Inspect and Restock After Cleaning | Check bathroom items for wear and restock essentials to maintain a functional and appealing environment after cleaning. |
Step 1: Gather and Prepare Cleaning Supplies
Preparing your bathroom cleaning arsenal sets the stage for a thorough and efficient cleaning session. Before diving into the scrubbing and sanitizing, you will collect all necessary supplies to streamline your cleaning process.
Start by assembling your cleaning toolkit with essential items. Pull together microfiber cloths, paper towels, a sturdy scrub brush, and cleaning solutions appropriate for different bathroom surfaces. The American Cleaning Institute recommends reading product labels carefully to understand proper usage and safety instructions for each cleaning product. Select multipurpose cleaners that can tackle different surfaces like tiles, mirrors, countertops, and fixtures.
Consider your health and indoor air quality when choosing cleaning products. The American Lung Association suggests using cleaning supplies with reduced volatile organic compounds (VOCs) to minimize potential respiratory irritants. Natural alternatives like warm water, mild soap, and baking soda can be effective and safer options for your bathroom cleaning routine.
Here’s a quick reference table comparing common bathroom cleaning products by effectiveness and health impact:
| Product Type | Cleaning Effectiveness | Health & Air Quality Impact | Ideal For |
|---|---|---|---|
| Multipurpose Cleaner | High | May contain VOCs | Tiles, counters, most surfaces |
| Mild Soap & Water | Moderate | Low chemical exposure | Delicate fixtures, daily wipe |
| Baking Soda Solution | Moderate | Non-toxic, safe | Sinks, tubs, stain removal |
| Disinfectant Spray | Very high | Can be respiratory irritant | Toilets, high-touch surfaces |
| Vinegar Solution | Moderate | Low but strong odor | Mirrors, faucets, glass |
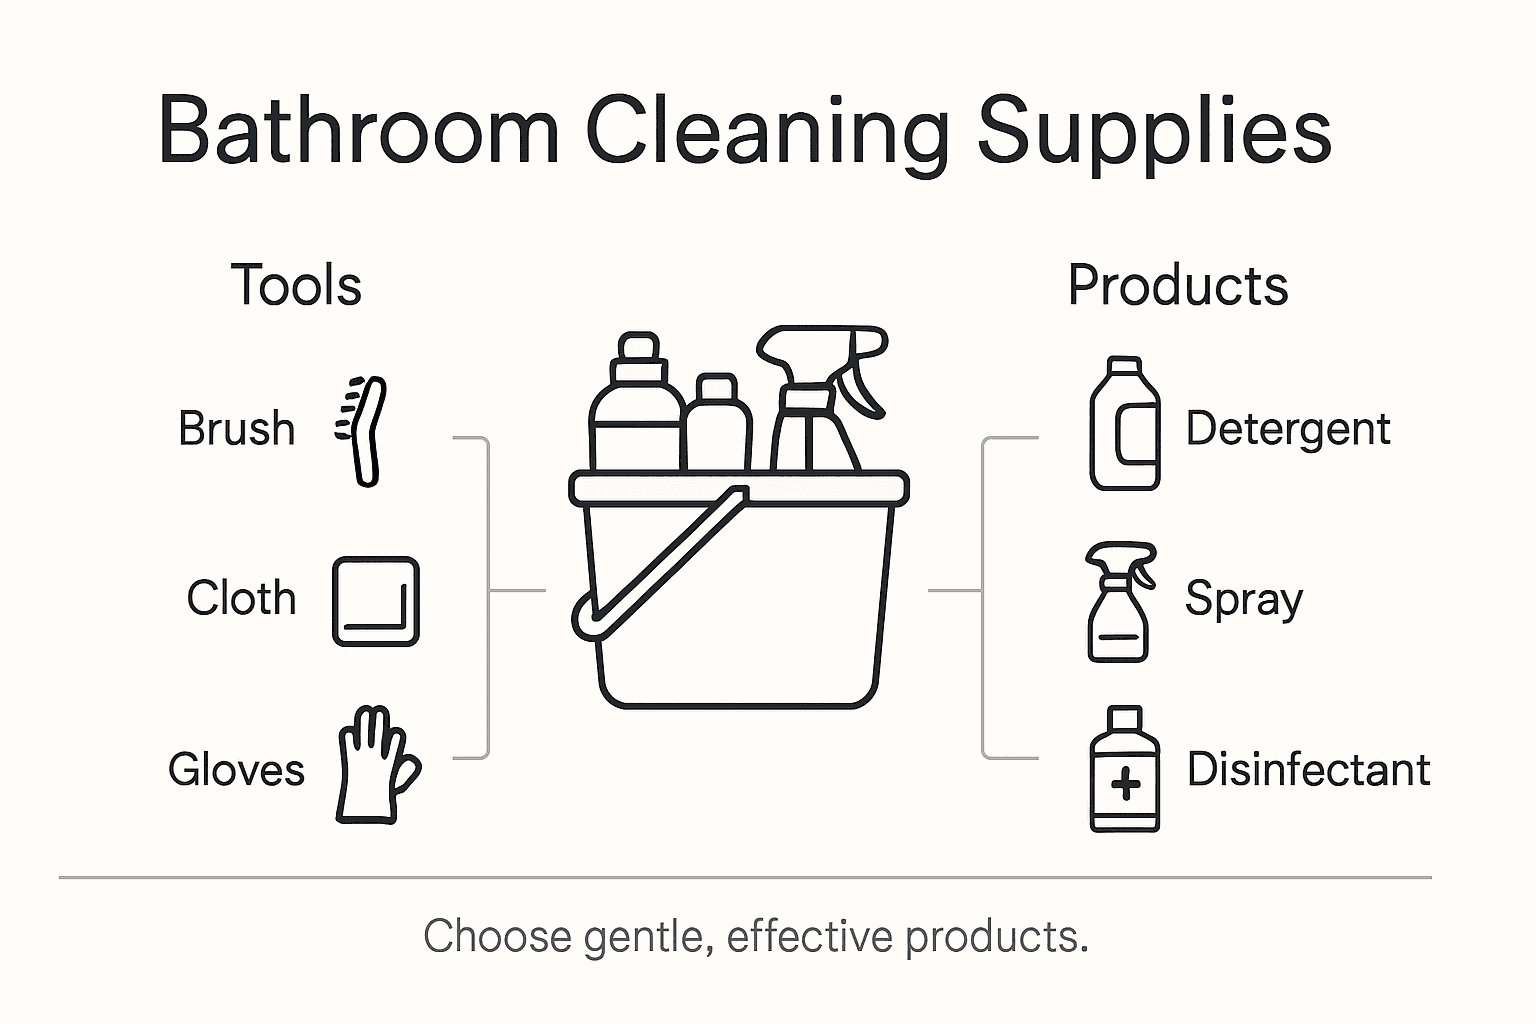
Pro tip: Organize your cleaning supplies in a portable caddy or bucket to make transportation and access easier during your cleaning process.
Step 2: Remove Items and Declutter Surfaces
Decluttering your bathroom is a critical first step in preparing for a thorough cleaning. By systematically removing items from surfaces, you create an efficient workspace that allows for comprehensive cleaning and sanitization.
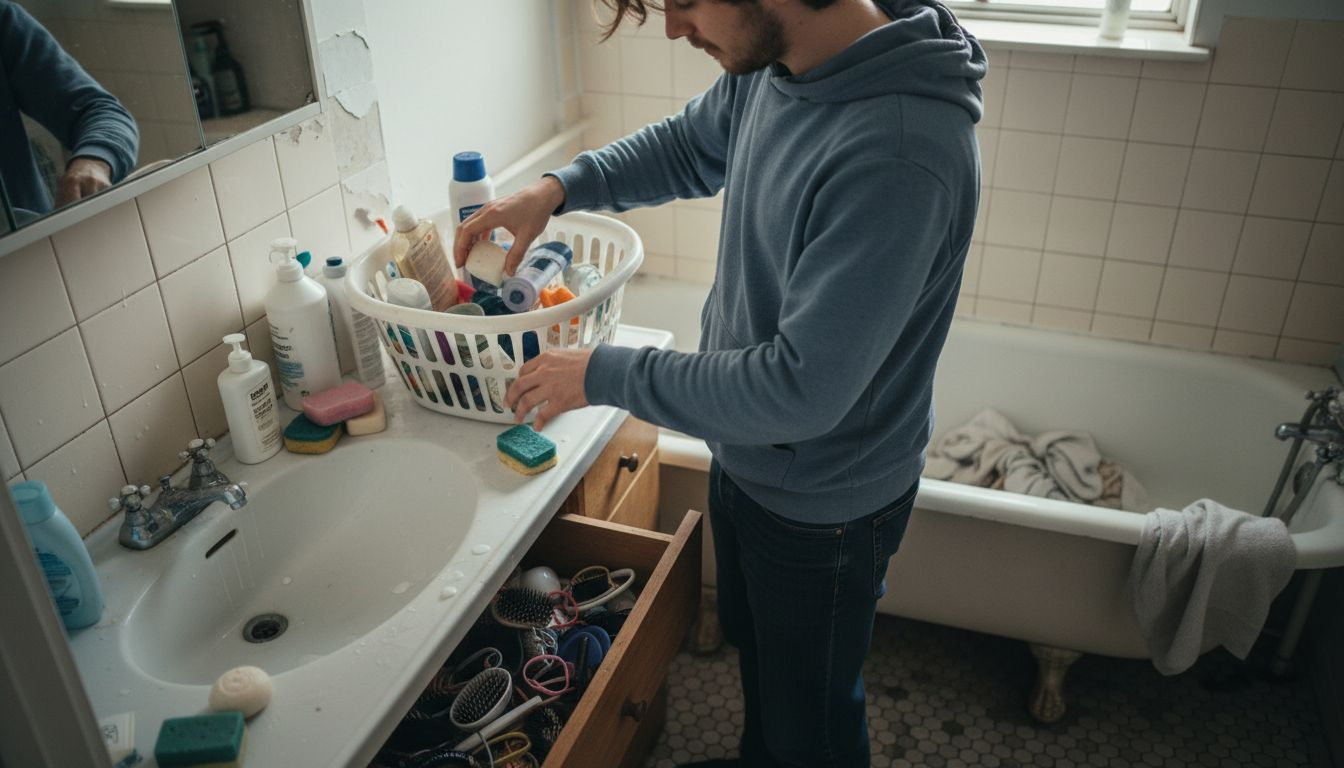
Clearing surfaces helps expose all areas for effective cleaning and prevents potential cross contamination. Begin by removing all movable items from countertops, shelves, and shower areas. This includes toiletries, decorative items, towels, and any personal accessories. Place these items in a temporary, clean staging area where they will not interfere with your cleaning process.
Intentional decluttering promotes both physical cleanliness and mental clarity by reducing dust accumulation and creating an organized environment. As you remove items, take a moment to evaluate what truly belongs in your bathroom. Discard expired products, consolidate partially used items, and wipe down containers before returning them to their designated spaces.
Pro tip: Sort your bathroom items into three categories while decluttering: keep, discard, and donate to streamline your organization process.
Step 3: Apply and Let Sit Core Cleaners
Applying cleaning solutions strategically is crucial for achieving a thoroughly sanitized bathroom. This step involves carefully distributing your cleaning products and allowing them sufficient time to break down dirt, grime, and potentially harmful microorganisms.
The Centers for Disease Control recommends using cleaning products with soap or detergent to effectively remove contaminants from bathroom surfaces. Start by selecting appropriate cleaners for different surfaces such as tiles, countertops, mirrors, and fixtures. Spray or apply the cleaning solution evenly, ensuring complete coverage of the target areas. Pay special attention to high touch surfaces and areas prone to moisture and bacterial growth.
Product labels provide critical guidance on the required dwell time for sanitizing surfaces. Different cleaning agents need specific contact times to effectively kill germs and bacteria. Most disinfectants require between 3 to 10 minutes of sitting time to ensure maximum efficacy. Resist the temptation to wipe immediately resist the urge to wipe the surface too quickly let the cleaner do its job by allowing it to sit for the recommended duration.
Pro tip: Set a timer on your phone to track the recommended dwell time for each cleaning product and prevent premature wiping.
Step 4: Scrub and Disinfect Key Areas
Scrubbing and disinfecting key bathroom areas is essential for creating a truly clean and hygienic space. This step focuses on methodically targeting surfaces that accumulate the most bacteria and require intensive cleaning attention.
Effective bathroom cleaning involves physically removing dirt through scrubbing and then systematically disinfecting high-touch surfaces. Concentrate on critical areas such as toilet seats, faucet handles, countertops, shower fixtures, and doorknobs. Use a firm scrub brush or microfiber cloth with your chosen cleaning solution to break down grime and remove visible dirt. Apply consistent pressure and circular motions to ensure thorough cleaning across different surface textures.
EPA-registered disinfectants should be applied to visibly clean surfaces to effectively kill remaining germs and prevent potential illness transmission. After scrubbing, spray your disinfectant evenly and allow it to sit for the recommended contact time specified on the product label. For bathrooms in high-traffic areas or homes with multiple residents, consider using safer disinfectant options containing active ingredients like ethanol or hydrogen peroxide to minimize chemical exposure while maintaining robust pathogen control.
Pro tip: Color code your cleaning cloths to prevent cross contamination between different bathroom surfaces and maintain a systematic approach to disinfection.
Step 5: Rinse, Dry, and Polish Surfaces
The final stage of bathroom cleaning transforms your space from clean to sparkling, focusing on removing cleaning residue and creating a pristine finish that looks and feels fresh.
Thoroughly rinsing surfaces is crucial to eliminate any remaining cleaning agent residues that could attract new dirt or potentially damage surface materials. Use clean water and microfiber cloths to wipe down all cleaned surfaces, ensuring no soap or chemical traces remain. Pay special attention to areas like faucets, countertops, shower walls, and mirrors where residue can easily accumulate and create unsightly streaks.
Drying and polishing surfaces prevents moisture buildup and helps maintain the bathroom’s aesthetic appeal. Use fresh, lint-free towels or microfiber cloths to dry surfaces completely. For fixtures and mirrors, use a separate clean cloth to buff and polish, creating a streak-free shine that highlights your thorough cleaning effort. This final step not only improves appearance but also helps prevent water spots and potential mold growth in damp areas.
Pro tip: Use newspaper or a microfiber glass cloth for streak-free mirror and chrome fixture polishing for a professional cleaning result.
Step 6: Inspect and Restore Bathroom Items
The final stage of bathroom cleaning involves a critical assessment of your newly cleaned space, ensuring everything is in perfect order and ready for future use. This step transforms your cleaning effort from mere surface cleaning to comprehensive maintenance.
Routine cleaning protocols emphasize the importance of systematically inspecting bathroom fixtures and consumables. Carefully examine each item for signs of wear, damage, or depletion. Check faucets for proper functioning, inspect toilet mechanisms, evaluate towel racks and dispensers, and assess the condition of soap dishes and other accessories. Look for any potential maintenance needs such as loose fixtures, chips, cracks, or areas requiring minor repairs.
Environmental cleaning guidelines recommend a comprehensive restoration process that goes beyond simple cleaning. Restock essential items like soap, hand towels, toilet paper, and other consumables. Replace any worn or damaged items, ensuring your bathroom remains both functional and aesthetically pleasing. Take this opportunity to reorganize items, wipe down containers, and create an inviting, well-maintained space that reflects your attention to detail.
Pro tip: Keep a small bathroom maintenance kit with items like spare screws, wall anchors, and adhesive strips to quickly address minor repairs during your cleaning routine.
This table summarizes tasks and benefits of each major bathroom cleaning step:
| Step | Main Task | Added Benefit |
|---|---|---|
| Gather Supplies | Assemble tools/products | Streamlines cleaning process |
| Remove & Declutter Items | Clear surfaces, sort items | Reduces dust, organizes space |
| Apply and Let Cleaners Sit | Distribute cleaners evenly | Maximizes germ removal |
| Scrub & Disinfect Areas | Scrub dirt, disinfect spots | Removes bacteria thoroughly |
| Rinse, Dry & Polish | Rinse and buff surfaces | Prevents residue, shines area |
| Inspect & Restore Items | Check and restock items | Maintains order, repairs needs |
Take Your Bathroom Cleaning to the Next Level with Trusted Help
Cleaning a bathroom thoroughly involves careful steps like removing clutter, applying the right cleaners, allowing them to sit, scrubbing, and proper rinsing as explained in this detailed guide. Many find maintaining this standard consistently overwhelming especially with busy schedules. Common challenges include tracking dwell times for disinfectants, avoiding cross contamination, and restoring bathroom items after cleaning to keep everything functional and fresh.
The Maid Society understands these exact pain points and offers professional cleaning services tailored to meet your needs. Our fully trained team uses detail-oriented methods to deliver deep cleaning and organization so you can reclaim your time and reduce stress. Whether you want regular upkeep or specialized move-in/move-out help, discover solutions that guarantee a pristine bathroom without the hassle.
Experience the comfort and peace of mind that comes with a truly clean home. Explore more expert tips on the Maid Society blog and then schedule trusted service today at The Maid Society. Don’t wait until dirt and clutter build up. Take the first step toward a sparkling bathroom now.
Frequently Asked Questions
How do I gather and prepare cleaning supplies for effective bathroom cleaning?
Gather essential cleaning supplies like microfiber cloths, a sturdy scrub brush, and appropriate cleaning solutions for different surfaces. Organize these items in a portable caddy or bucket to make the cleaning process more efficient.
What is the best way to declutter my bathroom before cleaning?
Remove all movable items from surfaces such as countertops, shelves, and shower areas. Sort them into three categories: keep, discard, and donate to streamline your organization process and maximize cleaning efficiency.
How long should I let cleaning solutions sit for effective disinfecting?
Allow cleaning products to sit for the recommended dwell time specified on the product label, which generally ranges from 3 to 10 minutes. This contact time is essential for killing germs and bacteria effectively.
What areas should I focus on when scrubbing and disinfecting the bathroom?
Concentrate on high-touch surfaces such as toilet seats, faucet handles, and doorknobs while scrubbing and disinfecting. Use consistent pressure and circular motions to ensure thorough cleaning in these critical areas.
How can I ensure that my bathroom surfaces are streak-free after cleaning?
Rinse all surfaces thoroughly to eliminate any remaining cleaning agent residues, and use lint-free towels or microfiber cloths to dry and polish them. For mirrors and chrome fixtures, use a separate clean cloth to achieve a streak-free shine.
What steps should I take to inspect and restore bathroom items after cleaning?
Carefully examine each fixture and consumable for wear, damage, or depletion, and restock essential items like soap and toilet paper as needed. This final inspection ensures your bathroom remains functional and inviting.
Get Cleaning Tips & Exclusive Offers
Join our community for time-saving hacks and special discounts delivered to your inbox.