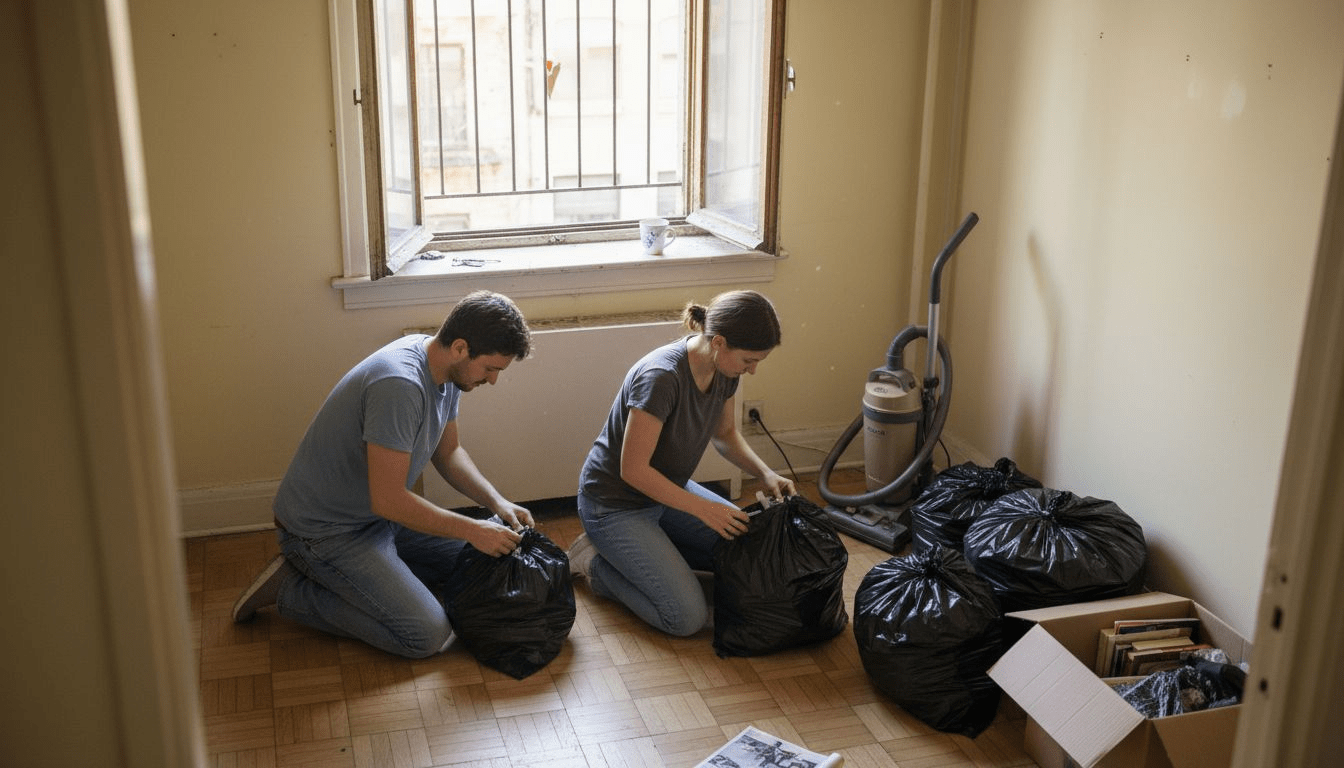
Property turnover can quickly become a headache when overlooked details slow the move-in process for new tenants. With nearly 40% of American renters relocating each year, Los Angeles property managers know every extra day costs money and peace of mind. A thorough move-out cleaning checklist not only protects your investment but also sets the stage for fast, hassle-free transitions to impress incoming residents and remain competitive in the busy rental market.
Table of Contents
- 1. Clear Out All Personal Items and Trash
- 2. Dust and Wipe Down All Surfaces
- 3. Deep Clean Kitchen Appliances and Cabinets
- 4. Sanitize Bathrooms and Fixtures
- 5. Sweep, Mop, and Vacuum All Floors
- 6. Inspect and Clean Windows and Doors
- 7. How to Clean a Silk Carpet Without Damage
Quick Summary
| Key Insight | Explanation |
|---|---|
| 1. Clear Out All Personal Items and Trash | Thoroughly remove all belongings to prepare for an organized move and avoid cleaning charges. |
| 2. Dust and Wipe Down Surfaces Systematically | Use a top-down approach to clean all surfaces, ensuring no area is missed. |
| 3. Deep Clean Kitchen Appliances and Cabinets | Focus on removing hidden grease and grime from appliances to prepare for the next occupant. |
| 4. Sanitize All Bathroom Fixtures Properly | Clean and disinfect bathroom surfaces to eliminate germs, especially in high-touch areas. |
| 5. Sweep, Mop, and Vacuum All Floors | Clean floors based on type, ensuring durability and maintenance of surface appearance. |
1. Clear Out All Personal Items and Trash
When preparing for a move out, the first critical step is thoroughly clearing out all personal items and trash from your living space. This initial phase sets the foundation for a smooth and organized moving process. BC Housing recommends complete removal of personal belongings to ensure a successful unit inspection and avoid potential additional cleaning charges.
Beginning this process requires a systematic approach. Start by walking through each room with a few essential supplies: garbage bags, donation boxes, and sorting containers. Systematically go through drawers, cabinets, closets, and storage spaces to remove every single personal item. This includes clothing, documents, decorative items, kitchenware, and any personal artifacts that have accumulated during your stay.
Trash removal is equally important. Carefully inspect all areas for discarded items, including behind furniture, inside cabinets, and in less visible spaces. Dispose of garbage properly and ensure no remnants are left behind. By completely clearing out personal items and trash, you demonstrate respect for the property and make the transition easier for the next occupant.
When sorting items, create distinct categories: keep, donate, sell, and discard. This approach helps streamline the moving process and reduces clutter. Pay special attention to hidden spaces where items might have been forgotten over time.
Pro tip: Create a systematic checklist for each room to ensure no area is overlooked during your personal item and trash removal process.
2. Dust and Wipe Down All Surfaces
After clearing out personal items, the next crucial step in move out cleaning is thoroughly dusting and wiping down all surfaces. The American Cleaning Institute recommends a systematic top-down cleaning approach that ensures no area is overlooked during the cleaning process.
Start by gathering the right cleaning supplies such as microfiber cloths, all purpose cleaner, and disposable wipes. Your goal is to remove dust, dirt, and grime from every surface including countertops, tables, shelves, windowsills, light switches, and door handles. Pay special attention to high traffic areas and surfaces that accumulate dust quickly.
Begin cleaning from the highest surfaces and work your way down. This means starting with ceiling fans, top of cabinets, and high shelves before moving to lower surfaces. Use a clean microfiber cloth or duster to remove loose dust particles. Follow up with an appropriate cleaning solution to sanitize and remove any remaining dirt or residue.
Prioritize areas like kitchen counters, bathroom surfaces, and other spaces where germs and bacteria tend to accumulate. Virginia Tech guidance suggests using soap and water to remove initial dirt before sanitizing surfaces, ensuring a comprehensive cleaning approach.
Pro tip: Use white vinegar and water solution for an eco friendly and effective surface cleaning alternative that cuts through grease and eliminates bacteria without harsh chemicals.
3. Deep Clean Kitchen Appliances and Cabinets
Deep cleaning kitchen appliances and cabinets is a critical step in preparing a living space for the next occupant. Move-in and move-out cleaning services emphasize thorough sanitization of kitchen areas, focusing on removing accumulated grease, grime, and hidden residues from both appliances and storage spaces.
Begin with a systematic approach to tackle kitchen appliances. Start with the refrigerator by removing all shelves and drawers. Wash these components separately with warm soapy water, then thoroughly wipe down the interior and exterior surfaces. Pay special attention to door seals, handles, and those hard-to-reach corners where food particles and bacteria can accumulate.
Move on to the oven and stovetop, which typically require the most intensive cleaning. Use a degreasing cleaner designed for kitchen surfaces to cut through stubborn cooking residues. For electric stovetops, remove burner grates and clean them individually. Gas stove owners should carefully clean around burner elements, ensuring no food debris remains.
Cabinets demand equally meticulous attention. Empty all cabinet interiors and drawers completely. Use a gentle all purpose cleaner to wipe down both interior and exterior surfaces. Check for any sticky spots, food splatters, or shelf liner that might need replacement. Wood cabinets may require special cleaning solutions to maintain their finish and prevent damage.
Pro tip: Always work from top to bottom when cleaning kitchen appliances and cabinets to prevent re-contaminating already cleaned surfaces.
4. Sanitize Bathrooms and Fixtures
Sanitizing bathrooms requires more than a simple wipe down. Experts distinguish between cleaning and disinfecting, emphasizing the critical difference in eliminating germs from bathroom surfaces and fixtures.
Begin by thoroughly cleaning all bathroom surfaces with soap and water to remove visible dirt and grime. This initial step is crucial because disinfectants work most effectively on already clean surfaces. Focus on high touch areas like faucets, toilet handles, sink counters, and shower fixtures. Use a microfiber cloth to ensure you remove all surface debris before applying sanitizing solutions.
Virginia Tech specialists recommend a systematic approach to bathroom sanitization, which involves multiple steps. After cleaning, apply an EPA approved disinfectant containing at least 70% alcohol. Pay special attention to areas prone to moisture and bacterial growth such as toilet seats, shower walls, and sink areas. Ensure complete coverage by spraying disinfectant and allowing it to sit for the recommended contact time before wiping.
Pay particular attention to often overlooked areas like grout lines, behind toilet bases, and around faucet fixtures. These spots can harbor significant amounts of bacteria and require extra scrubbing and sanitizing. Use a small brush or old toothbrush to get into tight spaces and ensure comprehensive cleaning.
Pro tip: Wear protective gloves and ensure proper ventilation when using bathroom cleaning and disinfecting products to protect your health and maximize cleaning effectiveness.
5. Sweep, Mop, and Vacuum All Floors
Floor cleaning is a critical component of move out preparation that goes beyond simple aesthetics to ensure a safe and sanitary living environment. Different floor types require specific cleaning approaches to maintain their appearance and longevity.
Begin by thoroughly sweeping or vacuuming all floor surfaces to remove loose dirt, dust, and debris. For carpeted areas, use a vacuum with strong suction and multiple attachments to reach corners and edges. Hard floors like tile, wood, and laminate require careful sweeping with a microfiber dust mop or soft bristle broom to prevent scratching surfaces.
The Cleaning Institute recommends a systematic approach to floor cleaning that involves multiple steps. After removing loose dirt, prepare appropriate cleaning solutions for each floor type. Hardwood floors need specialized wood cleaners, while tile and vinyl can tolerate more robust cleaning solutions. Use a well wrung out mop to prevent excess water from damaging flooring materials.
Pay special attention to high traffic areas and spots near entryways where dirt and grime accumulate most quickly. Use a hands and knees approach with a microfiber cloth for detailed cleaning of baseboards and hard to reach areas. Ensure you clean under furniture and in corners where dust and debris tend to collect.
Pro tip: Always test cleaning solutions on a small inconspicuous area first to ensure they do not damage or discolor your specific flooring material.
6. Inspect and Clean Windows and Doors
Moving out requires meticulous attention to windows and doors, which are often overlooked during standard cleaning processes. These surfaces not only impact the visual appearance of a space but also play a critical role in the final property inspection.
Begin by removing all window coverings and thoroughly examining window surfaces both inside and outside. Use a glass cleaner and microfiber cloth to eliminate streaks, fingerprints, and accumulated dust. Pay special attention to window tracks, sills, and frames where dirt and grime tend to collect. For glass surfaces, work in a systematic pattern from top to bottom to ensure complete coverage and prevent redepositing dirt.
Comprehensive move-out checklists recommend detailed inspection of door surfaces, including painted, varnished, and wooden elements. Clean door frames, handles, locks, and edges using appropriate cleaning solutions for each material. Wood surfaces might require specific wood cleaners, while painted doors can typically be cleaned with mild all purpose cleaners.
For windows with screens, carefully remove and clean them separately. Wash screens with mild soap and water, allowing them to dry completely before reinstalling. Check for any tears or damage that might need repair. Inspect door hardware for functionality and clean metal surfaces to remove fingerprints and oxidation.
Pro tip: Use newspapers or coffee filters instead of paper towels when cleaning glass surfaces to achieve a streak free shine and prevent lint accumulation.
7. How to Clean a Silk Carpet Without Damage
Silk carpets represent a luxurious and delicate floor covering that requires specialized cleaning techniques to maintain their exquisite appearance and prevent irreversible damage. These fragile textiles demand a gentle and informed approach to cleaning and maintenance.
Begin with gentle vacuuming using a suction only vacuum cleaner without a rotating brush. Set the vacuum to its lowest power setting and use a soft attachment to prevent fiber damage. Move the vacuum in the direction of the carpet nap to minimize stress on the delicate silk fibers.
The Carpet and Rug Institute recommends using pH neutral cleaning agents for spot cleaning and immediate spill management. When addressing stains, blot rather than rub the affected area. Use a clean white cloth with minimal moisture and apply gentle pressure to lift the stain without spreading or embedding it deeper into the carpet fibers.
For comprehensive cleaning, professional services specializing in delicate textiles are strongly recommended. These experts understand the intricate nature of silk carpets and can provide deep cleaning without compromising the carpet’s structural integrity. Avoid steam cleaning or harsh chemical treatments that can permanently damage silk fibers.
Pro tip: Keep silk carpets away from direct sunlight and high traffic areas to minimize wear and preserve their delicate texture and color.
Below is a comprehensive table summarizing the key guidance and detailed steps for performing thorough move-out cleaning as discussed throughout the article.
| Cleaning Aspect | Detailed Actions | Key Benefits |
|---|---|---|
| Clearing Personal Items and Trash | Conduct a walkthrough of all rooms with garbage bags, donation boxes, and sorting containers; remove items systematically from all spaces; create categories for keeping, donating, selling, and discarding. | Ensures all belongings are accounted for and prevents overlooked items from causing delays. |
| Dusting and Surface Cleaning | Use microfiber cloths and appropriate cleaning solutions; follow a top-down approach for ceilings, surfaces, and high-touch areas; focus on counters and light switches. | Maintains thorough sanitation and eliminates accumulated dust and allergens. |
| Cleaning Kitchen Appliances | Clean refrigerator components separately; degrease ovens and stovetops; wipe down interior and exterior cabinet surfaces. | Restores kitchen cleanliness and prepares appliances for the next occupant. |
| Bathroom Sanitization | Clean surfaces with soap and water followed by an EPA-approved disinfectant; scrub tightly sealed spaces; focus on high-moisture areas prone to bacterial growth. | Removes bacteria and ensures a germ-free environment for new tenants. |
| Floor Maintenance | Sweep and vacuum all floors; use appropriate cleaning solutions for each flooring type; ensure detailed cleaning of edges and under furniture. | Preserves flooring materials and enhances the room’s visual appeal. |
| Windows and Doors Cleaning | Clean windows and doorframes with appropriate products; remove streaks and grime; inspect for functional issues and damage. | Improves overall appearance and ensures the property is ready for the inspection. |
| Specialized Silk Carpet Care | Use a suction-only vacuum at low power for delicate carpets; clean stains using a pH-neutral cleaner applied gently. | Protects the carpet’s delicate fibers and maintains its pristine condition. |
This table encapsulates the essential procedures and their associated advantages for effective and comprehensive move-out cleaning.
Make Your Move-Out Cleaning Stress Free with Professional Help
Moving out is never just about packing and planning. The detailed steps in this checklist reveal how exhausting it can be to clear out personal items, deep clean kitchens, sanitize bathrooms, and tackle every corner with care and precision. If you feel overwhelmed by the thoroughness of this process or want to ensure every surface shines without missing a spot, you are not alone. Many face these exact challenges and look for trusted solutions.
Take the weight off your shoulders and enlist expert assistance tailored for move-outs. At The Maid Society, our fully trained team understands the importance of meticulous move-out cleaning as detailed in Move-In & Move-Out Cleaning Tips | The Maid Society. We deliver consistent, respectful, and detail-oriented cleaning, helping you save time and avoid stress so you can focus on your new beginning. Discover more about our range of services and how we can transform your move-out experience at The Maid Society. Also, explore our Expert House Cleaning Tips & Tricks | The Maid Society Blog for helpful advice to keep your home fresh anytime. Ready to make your move-out spotless with less hassle Book your appointment with us today and experience moving made simple!
Frequently Asked Questions
What should I prioritize in my move-out cleaning checklist?
Focusing on clearing out all personal items and trash should be your top priority. Start by systematically going through every room to ensure nothing is left behind, as this sets the foundation for a successful cleaning process.
How can I effectively dust and wipe down surfaces during my move-out cleaning?
Utilize a top-down cleaning method to ensure all surfaces are covered. Begin from higher locations, such as ceiling fans and high shelves, and work your way down to lower surfaces, using microfiber cloths and appropriate cleaners.
What steps should I take to deep clean kitchen appliances?
Start by removing all components from appliances, like shelves and drawers from the refrigerator. Clean these parts with warm, soapy water, and use a degreaser on the oven and stovetop to eliminate stubborn residue.
How do I sanitize bathrooms properly before moving out?
First, clean all surfaces with soap and water to remove visible dirt. Afterward, apply an EPA-approved disinfectant on high-touch areas and ensure it sits for the recommended time before wiping down, paying close attention to hidden spots prone to bacteria.
What is the best way to clean floors when I’m moving out?
Sweep or vacuum all floors to remove loose dirt and debris before using a suitable cleaning solution for each floor type. Ensure that you focus on high traffic areas and utilize a well-wrung mop to avoid excess water damage.
How can I ensure my windows and doors are cleaned effectively?
Remove window coverings and thoroughly clean both the inside and outside surfaces with glass cleaner and a microfiber cloth. Pay particular attention to the window tracks, sills, and door handles to ensure they are spotless and ready for inspection.
Recommended
Get Cleaning Tips & Exclusive Offers
Join our community for time-saving hacks and special discounts delivered to your inbox.